Snapshots on macOS can act as internal backup mechanisms, protecting writers from losing work after any revision or edit.
Say Cheese! Or Not Ready for Instagram
Note: Both the macOS and Windows versions of Scrivener support snapshots; however, this blog post uses examples from and demonstrates some features that are currently only available on Scrivener 3 for macOS.
From narcissistic selfies to resplendent landscape panoramas, an amazing amount of revision goes into crafting the perfect Instagram to share with family, friends, and the world. Written works behave similarly. Writers will revise and edit again and again until our masterpiece emerges like Gandalf the White through ash and fire, birthed into this world as a new, remarkable being. However, every now and again you’ve probably deleted a paragraph, a page, or perhaps even an entire chapter and thought later, “What was I thinking?!” Meanwhile, you scramble to find a way to fix your ruined revision by locating a copy or backup of the original piece. Sometimes you win. Sometimes you lose.... If only you could go back in time, right?
Fortunately, with Scrivener you can.
Say Cheese!
For seasoned Scrivener users, Snapshots aren’t new, but if you’re not using this feature, then today you’re going to learn why you should. The snapshot is a remarkable internal backup mechanism that has saved many a written word, and it could save your words too.
Imagine for a moment, that you could revise and edit any text within your project with no consequences. Perhaps you made a poor decision and deleted that perfect paragraph during a revision a few days ago and you’re dying to have it back? If you took a snapshot, then you have nothing to fear...
- Open the Inspector pane and select Snapshot pane, then locate the Snapshot that contains the paragraph that you’re longing for like a lost love cast adrift at sea.
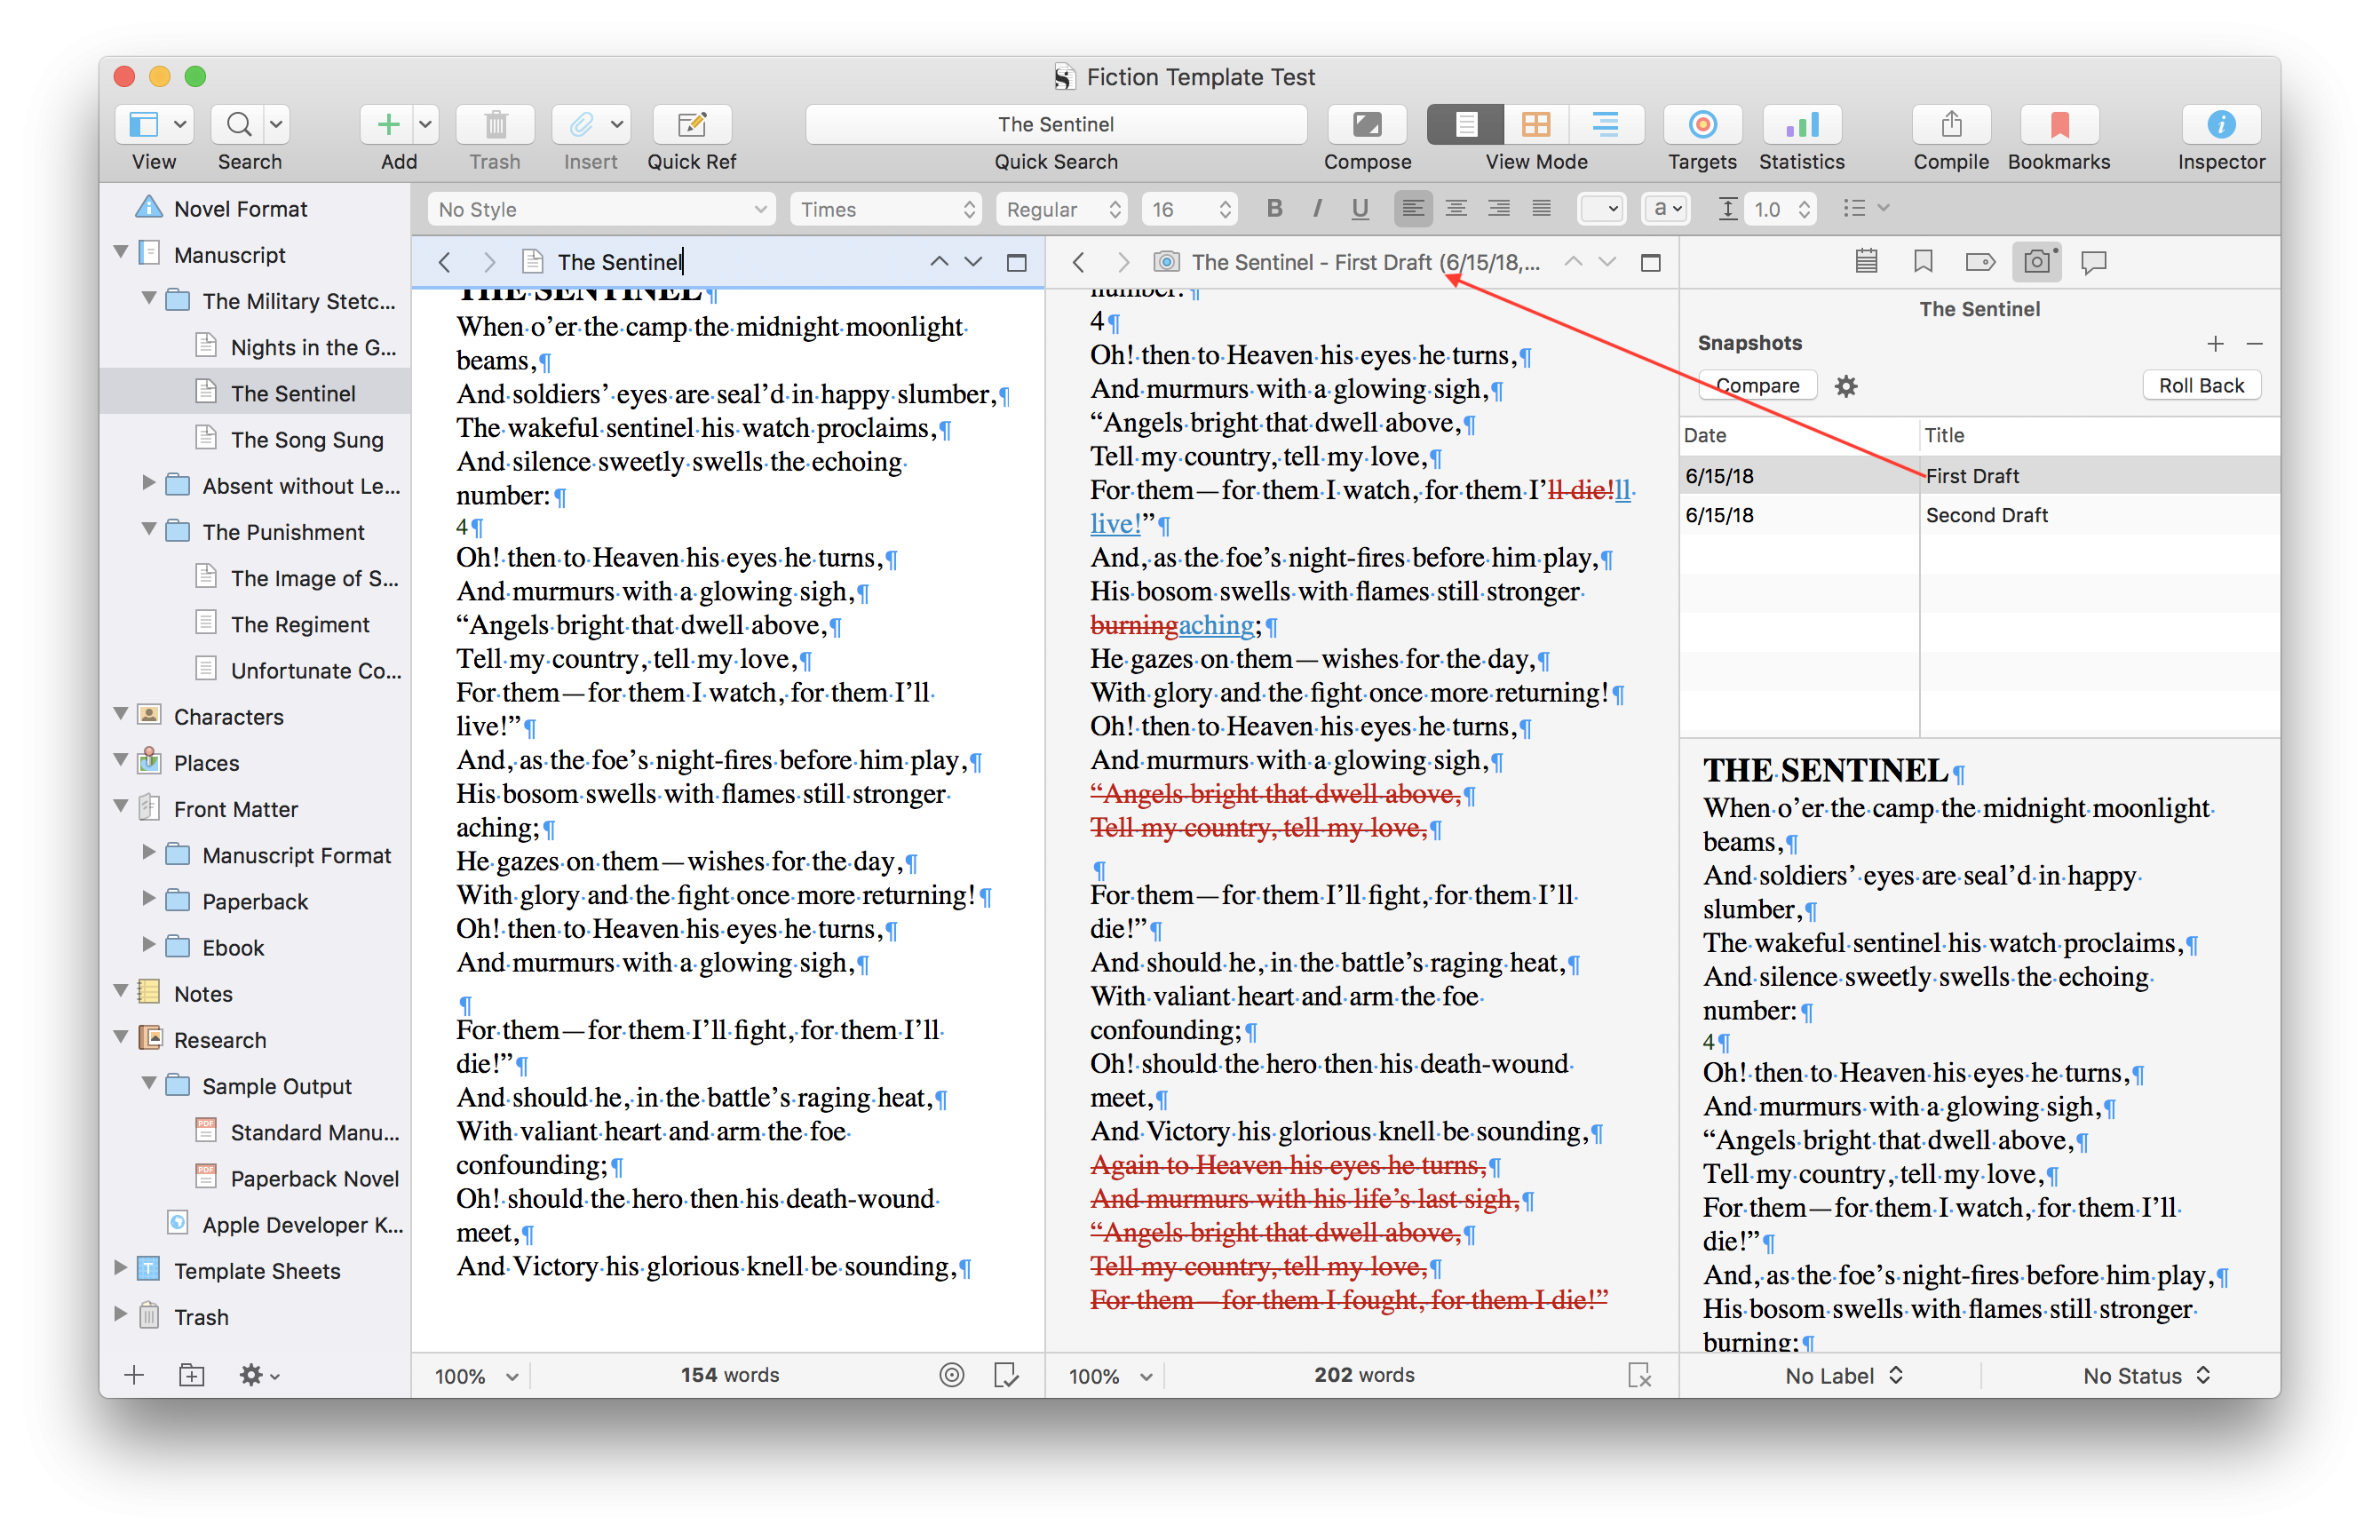
- Within the Snapshot pane, the easiest way to find your missing paragraph is to select compare. Deleted text will now show up in red strikethrough. Text that replaced deleted text will show up in blue strikethrough.

3. Locate the deleted paragraph in the inspector, select "Original" to return it to its original formatting, and finally copy and paste the paragraph back into your project.

Easy right? However, remember that snapshots aren’t snapped automatically. You’ll need to take a snapshot before making any major edits to your project files.
Pro Tips: Use Command + 5 (⌘5) to take a quick snapshot of the text you are currently viewing, or use Command + S (⌘S) when you toggle on "Take snapshots of changed text documents on manual save" in Scrivener > Preferences > General > Saving.
Roll Backs
Well that’s one way of doing it, but what if you’ve made so many changes and the result is a post-apocalyptic nuclear bomb that turned your story from Pushing Daisies into Resident Evil. Say hello to Roll Back! If instagrammers make a mistake they can revert back the original photo, why not writers with their written works? To roll back to a previous version of text, you’ll need to select which snapshot you desire to roll back to within the Snapshot pane. Once selected, click the Roll Back button and follow the prompts.
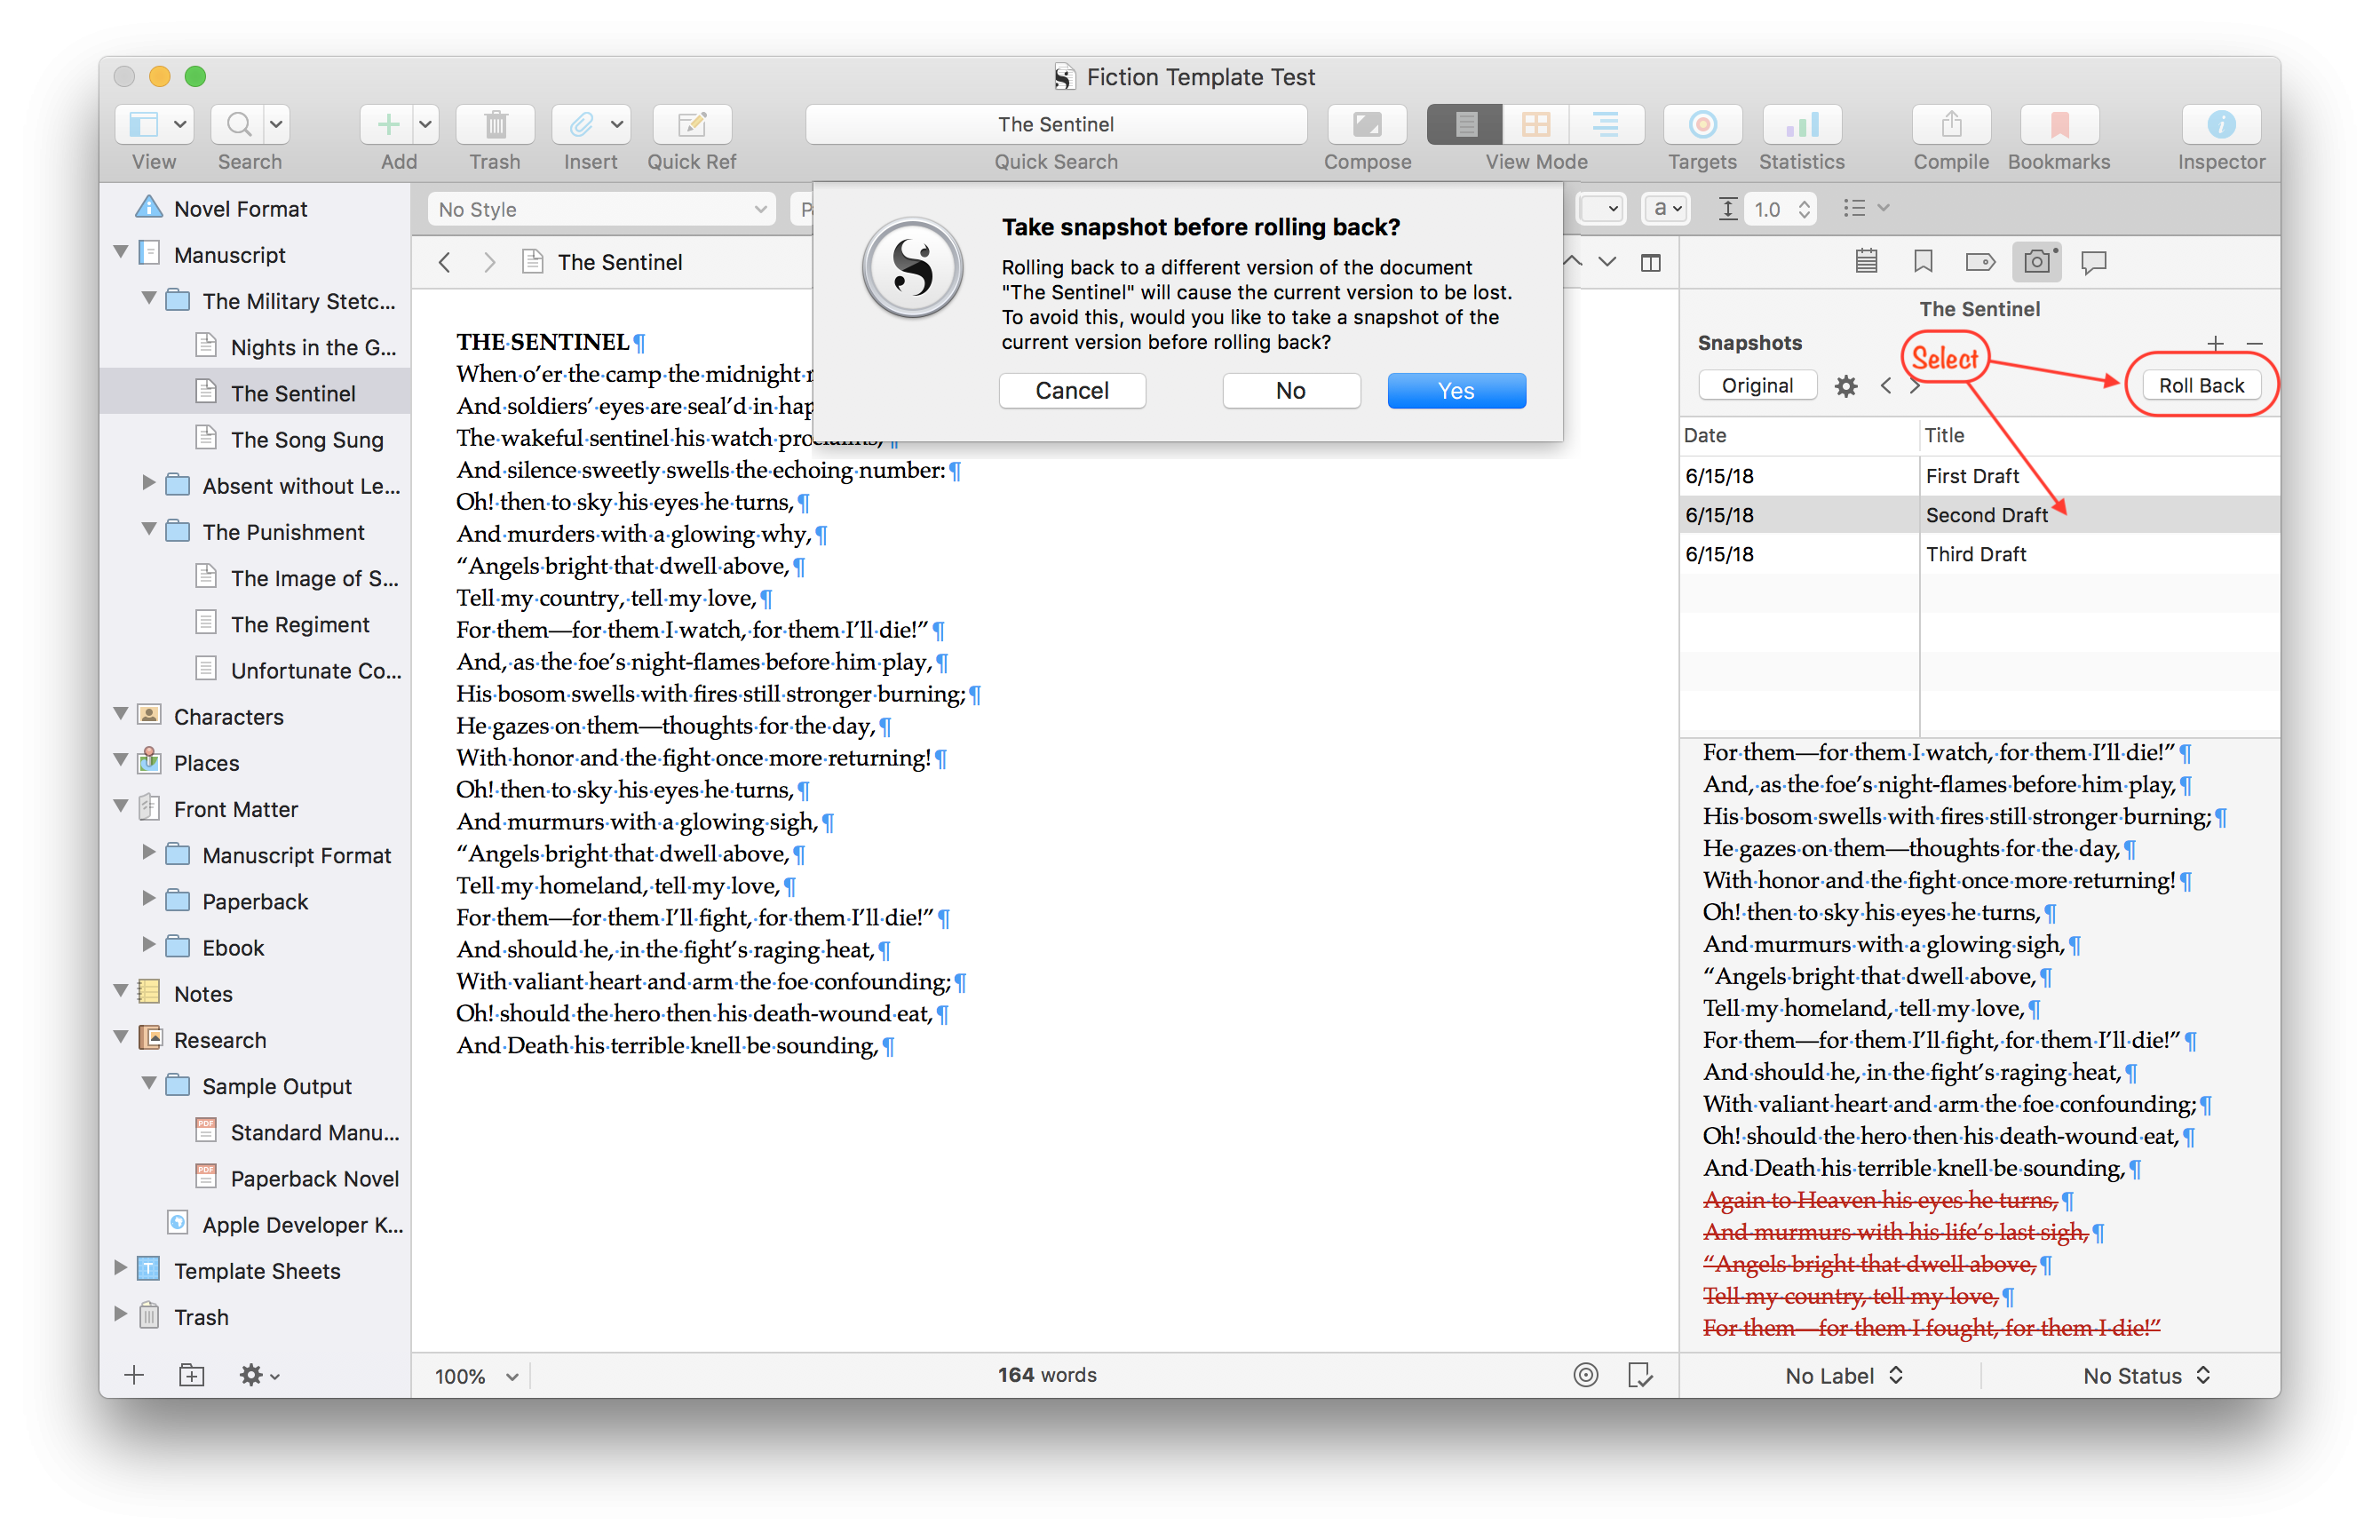
A WORD OF CAUTION:A message will pop-up confirming your action and asking if you’d like to take a snapshot of the text as it appears in the editor. Don’t click “No” unless you’re absolutely certain you don’t want that particular revision, as Scrivener will overwrite the text in the editor, and it’s gone. Who knows, perhaps Resident Evil is the direction your novel was meant to go after all? Only time will tell...
Side by Side Comparison
Just like you can compare two different filters on a photo, in Scrivener on macOS you can compare snapshots with each other or against the text currently in your binder within the main editor.
- In the right corner of Editor’s header, select split screen.
- Drag and drop the snapshot from the Inspector Pane into either of the Editor’s Headers.
You can repeat this process and place a different snapshot in the opposite editor to view two snapshots side by side. Alternatively, you can avoid using the Inspector all together and access your snapshots from the the main editor by right clicking the header bar selecting either View Snapshot in Other Editor or View Snapshot on CopyHolder.
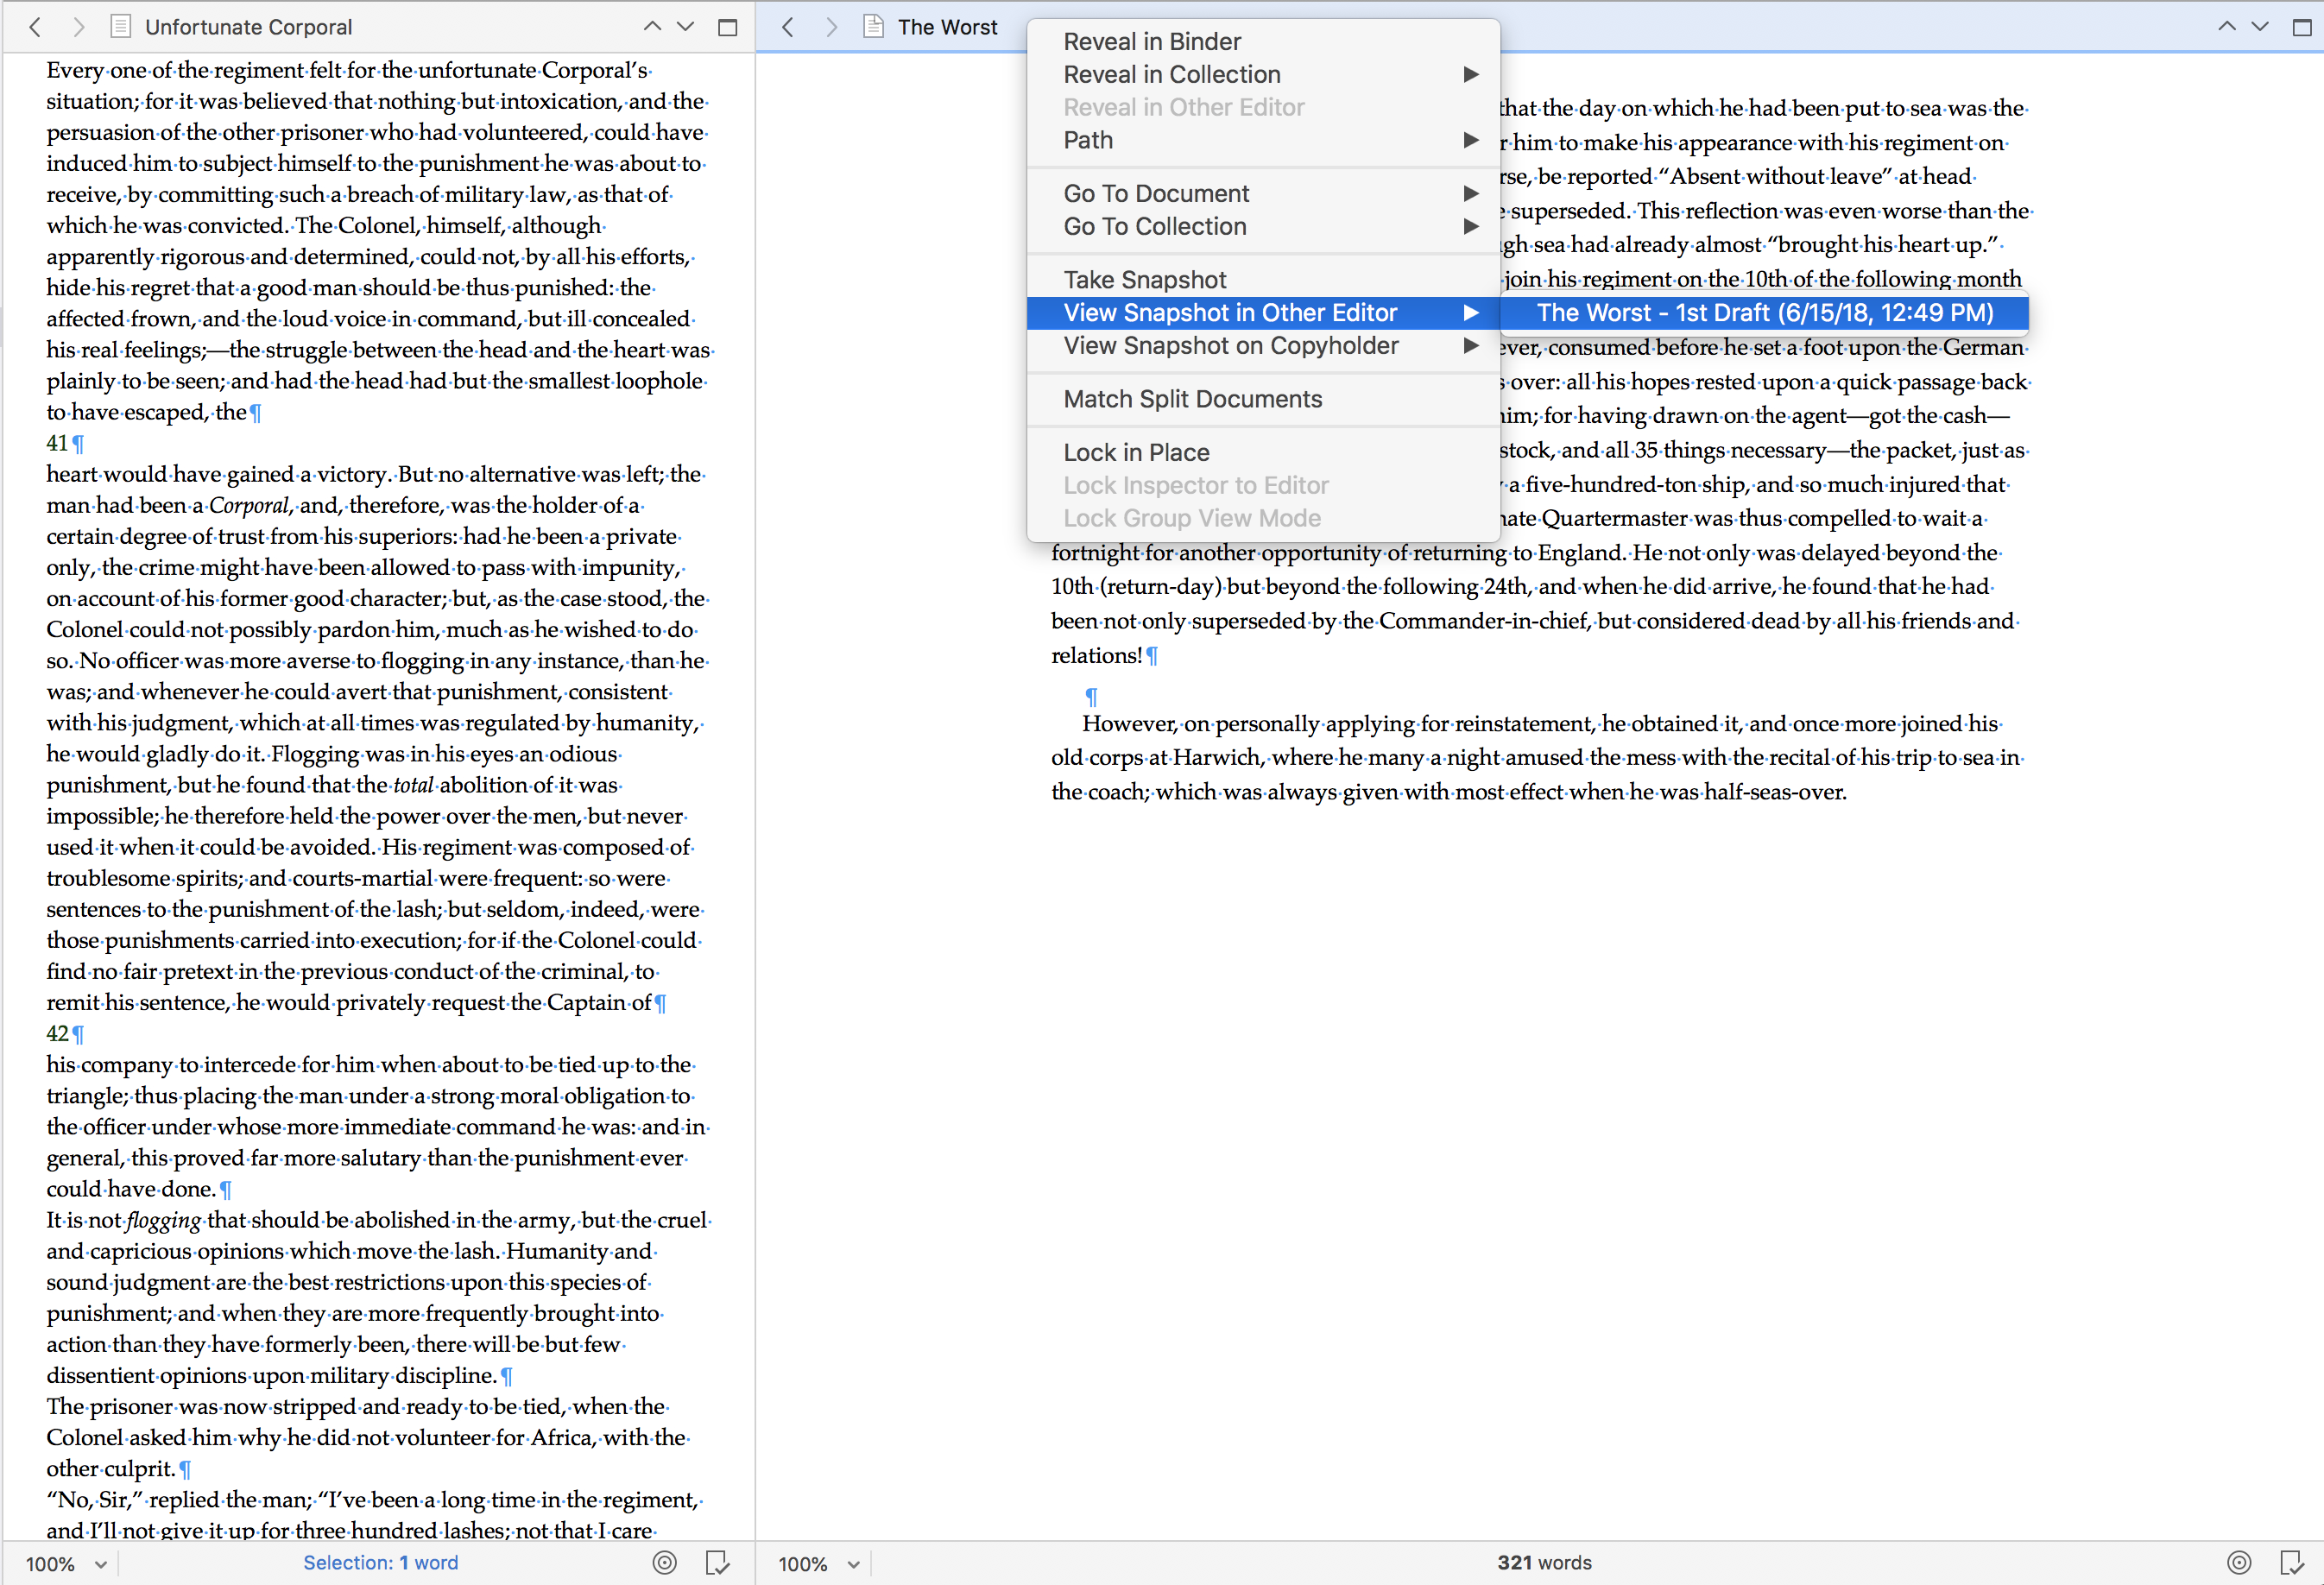
The figure above illustrates how to locate these options from the Editor's header bar. If the snapshot is selected as it appears, then the split editor to the left will navigate to the snapshot for a side by side comparison.
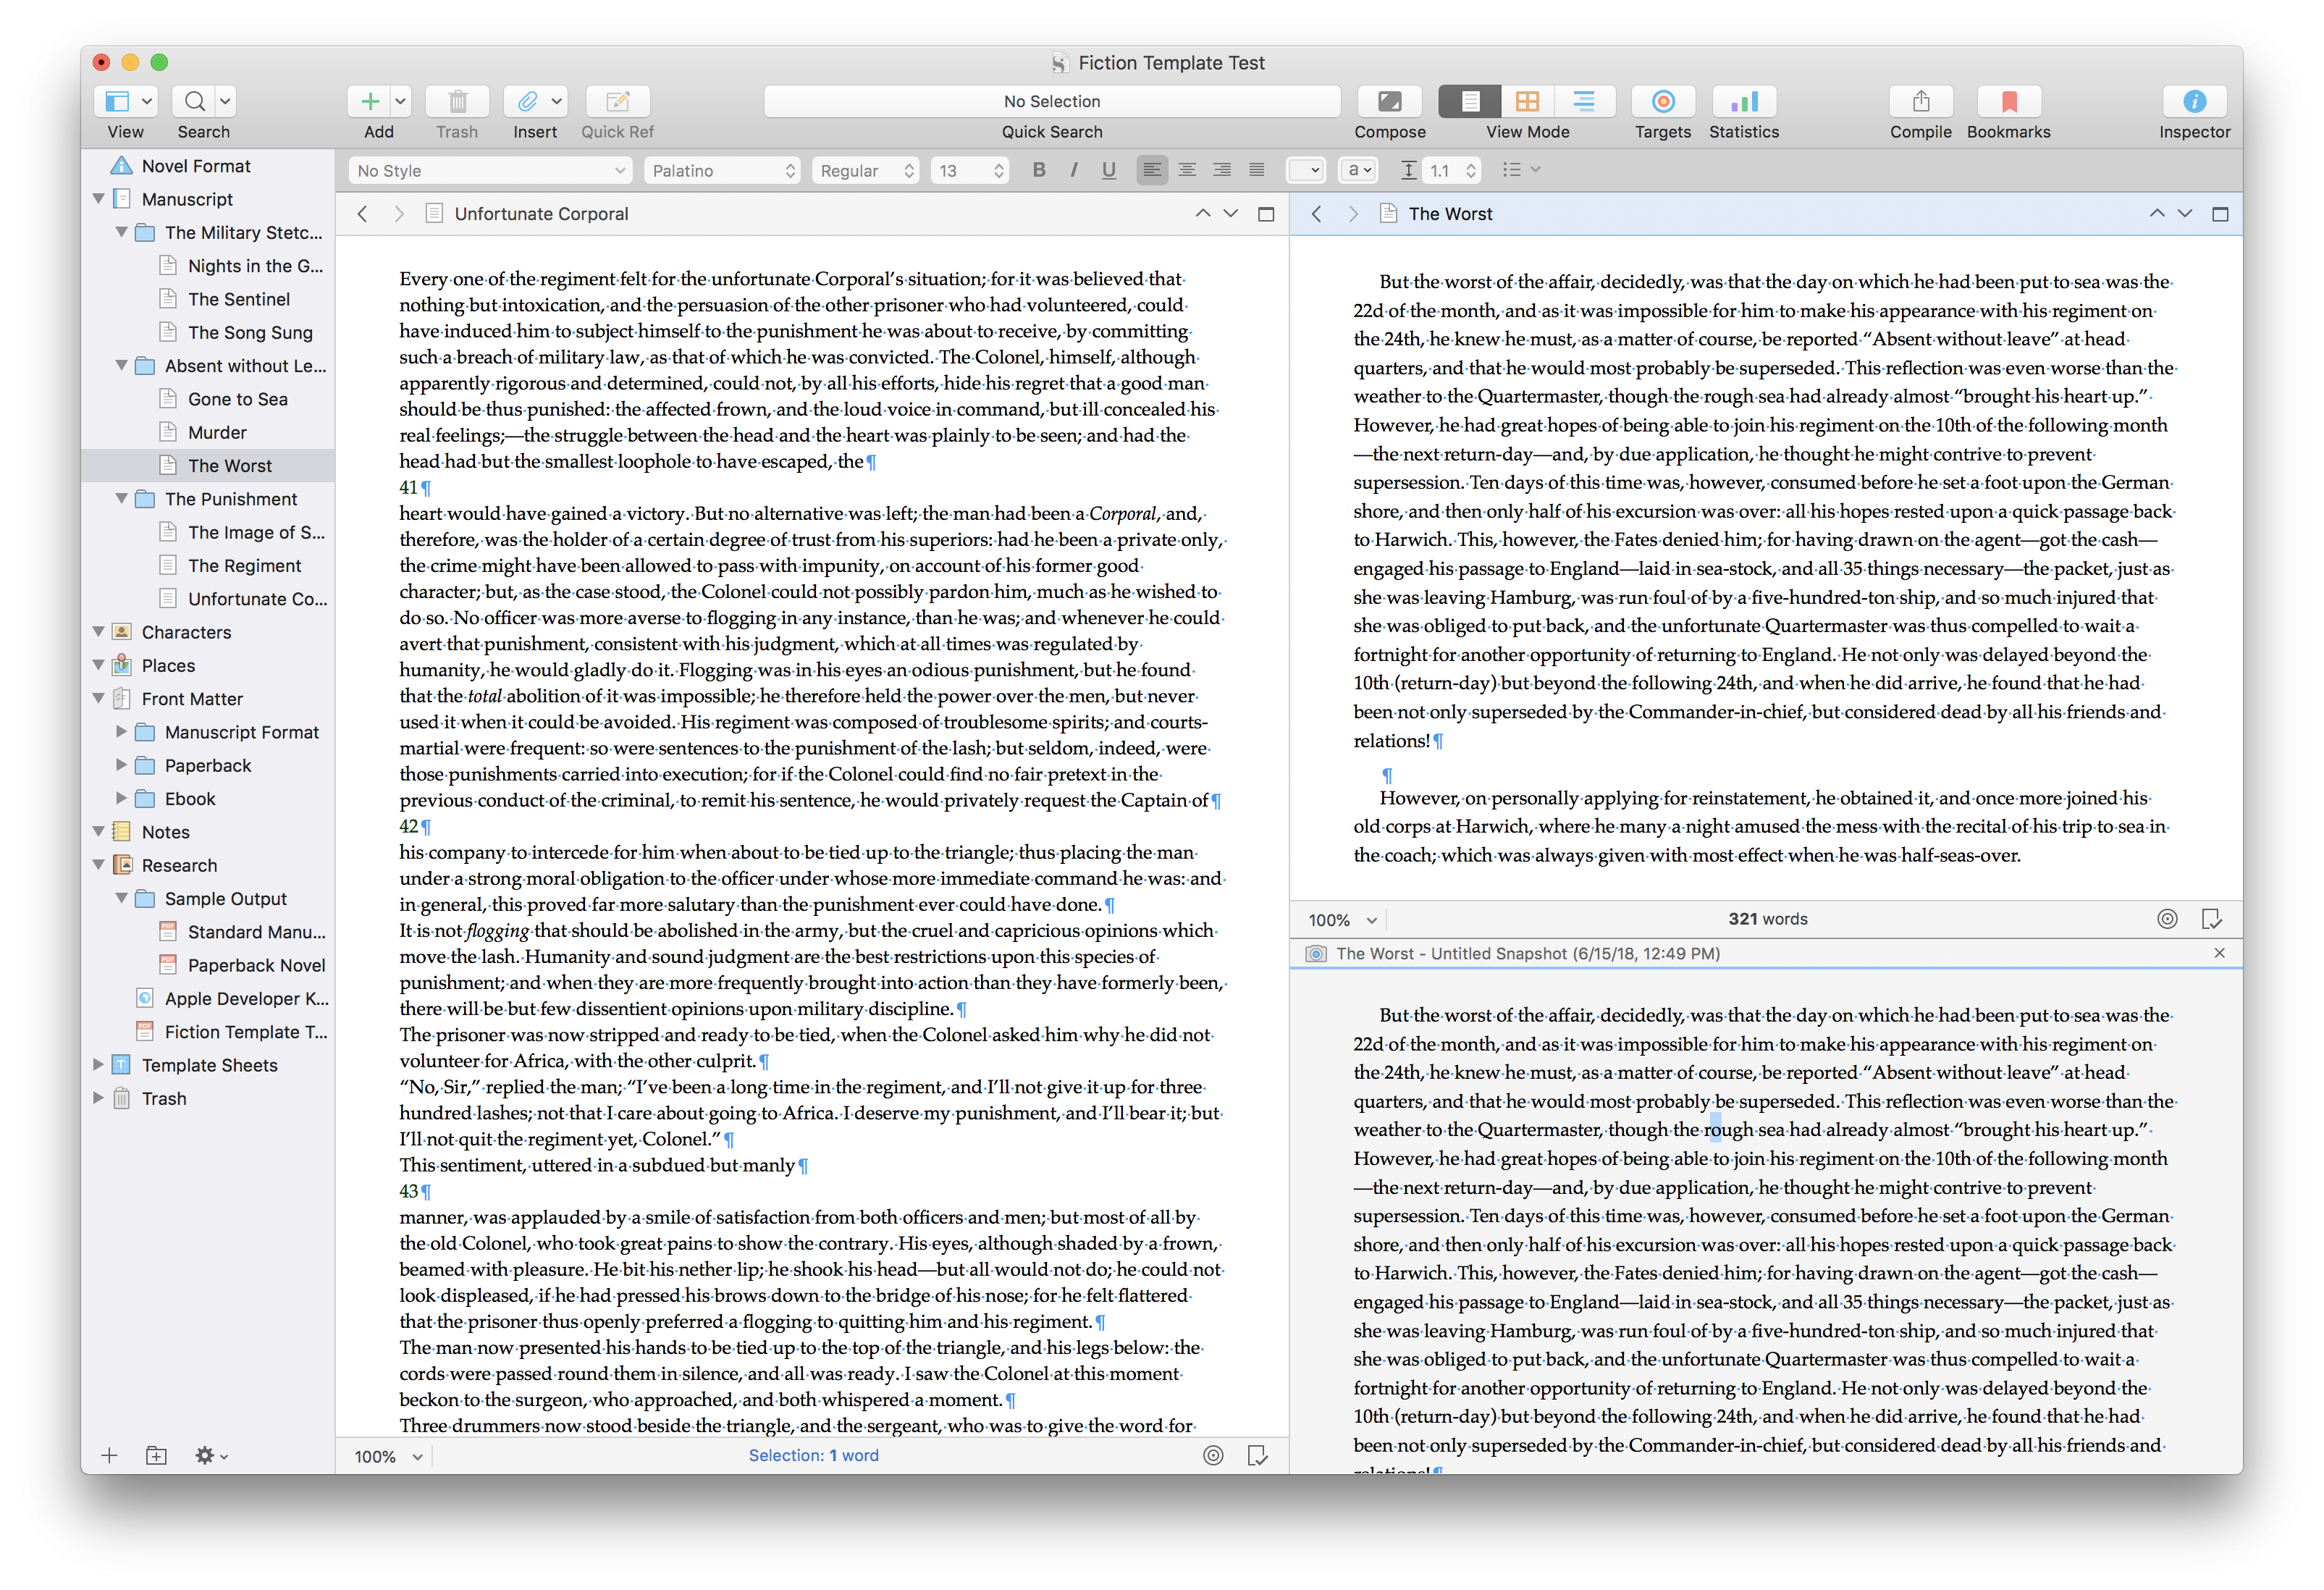
The figure below illustrates what the editor will look like if you selected the View Snapshot on Copyholder. Scrivener allows you to have two copyholders within the editor for a total of four views. Note that copyholders are only capable of displaying text or media, not editing it. However, it does make them an excellent tool for reviewing snapshots against the current text.
Pro Tip: Holding option (⌥) while dragging and dropping into the Inspector or while selecting a snapshot in the header bar will result in the snapshot entering comparison mode so that changes are highlighted in red strikethrough, and text that replaced deleted text will show up in blue strikethrough.Renaming Snapshots
Did you know that you can rename your snapshots? Double-click the snapshot title in the Inspector to edit it. You could, for example, name them First Draft, Second Draft, and so on, but you can also get a little more creative. Let’s say you’re exploring two separate plot directions for a particular scene or chapter.
In the figure below, you’ll notice that the snapshots have been labeled based on two different plot directions. In this way, the snapshot tool can be a unique, efficient way to explore different plot arcs within a draft without occupying a plethora of space in your binder. You can always Roll Back to a previous version if you don’t like the new direction.
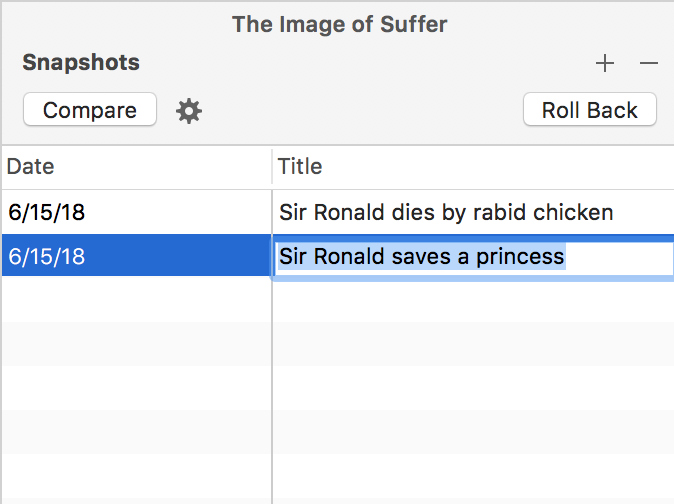
Pro Tip: Rename snapshots based on their plot direction to test out conflicting plot points without fear of losing your previous work.
The Snapshots Manager
So, let's say you just took a zillion snapshots, and you want to trim the fat so that only the best and most important backups are in reserve. Well, you could look at each document individually, or you could open the Snapshots Manager and view all the Snapshots in your project as a whole. To open the manager go to Documents > Snapshots > Snapshots Manager.
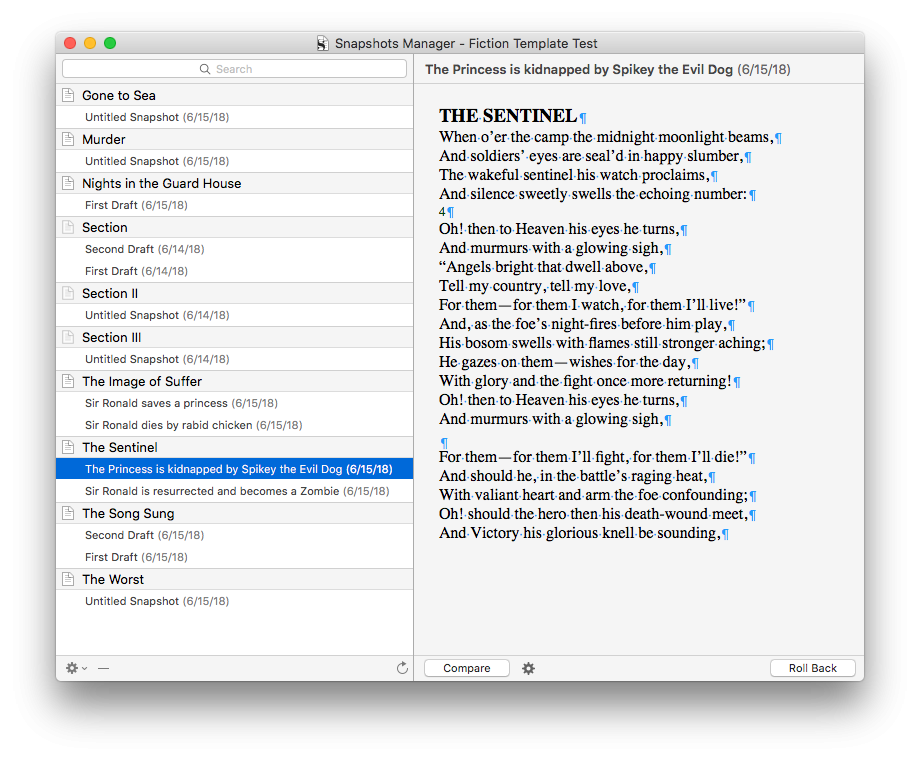
In the figure above, you'll notice that the window is divided into two panes. To the left, we have the a list of all the snapshots in your project by folder. Note that these documents are listed in alphabetical order and not based on the structure of your project. The snapshots listed under each document are also listed in reverse chronological order. From the manager, you can view any snapshot by selecting it. You can compare it with the current document by selecting the compare button, and you can even select the Roll Back button to roll back to a previous version. This manager is an expanded view of the inspector that gives you the power to quickly review, delete, or export snapshots for your entire project.
Pro Tip: Right-click any snapshot in the manager to reveal its location in the binder, delete it, or export it out of Scrivener.
So, let’s recap, with snapshots you can revise and edit without consequence, locate deleted written gems, compare text snapshots side by side in the editor or in the Snapshots Manager, and even roll-back to a previous version of the text all while still saving the current revision you didn’t like right now, but, let’s face it, you might want back later. And that's not even the half of it. You can compound your learning beyond the basics in the macOS user manual. Now go forth and snapshot...
0 Comments
Please sign in or register to comment on this post.
Register
Sign in
Forgotten password