Use custom icons in the Binder to see your project more clearly.
The Binder is the heart of your Scrivener projects. It’s where you build the structure of your work, whether it’s a novel, essay, or screenplay, and it’s a constant reminder of how your project is formed. Some people may only use a couple of folders and texts in the Binder, and others may break down their projects into dozens of elements.
The ability to use folders and texts in the Binder is one of Scrivener’s most powerful features. But when you’re working on a complex project, it can be helpful if the Binder gives you some visual idea of what these items contain. Scrivener sets bland folder and file icons for the Binder’s elements by default, but you can modify these, using dozens of alternate icons, and even add your own. Here’s how.
Why you might want to use custom icons
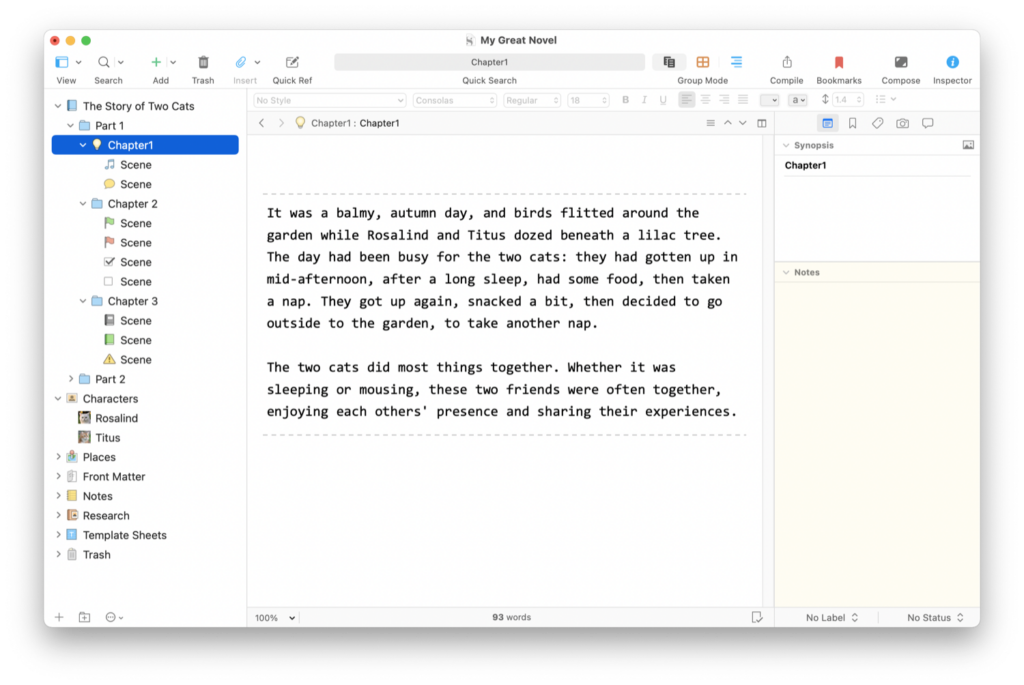
You can see in Scrivener projects that, in addition to the folder and file icons, a number of elements have custom icons. This is the case for the Characters and Places folders, the Front Matter, Notes, Research, and Trash. These custom icons are used to make it easier to spot the different folders at a glance.
You may want to leave the other icons as they are – blue folders and white documents – but you can change them to suit your project, either to remind you of what each item is for, or to mark their status. Here are some examples of how you might want to use custom icons:

Chapter 1 has a few icons on the folder and texts that the author may find helpful to understand what each scene will contain. Chapter 2 shows two ways of using icons to indicate status. The first two scenes have green and red flags; you may want to use these to indicate sections that you have finished, need to revise, etc. Below are two checkboxes: you could have unchecked boxes for scenes to revisit, and checked boxes for scenes you feel are complete.
Chapter 3 shows a few other ideas: two book covers, which you could use as status markers, and a warning icon, which you can apply to remind you that something needs to be fixed.
The Characters folder contains two character sheets, for the main characters in this story, using photos imported into the project.
How to change Binder icons
It’s easy to change Binder icons, and Scrivener includes dozens of them. To change an icon, select an item, then choose Documents > Change Icon, or right-click on an item and choose Change Icon; the Change Icon menu item is near the bottom of the menu that displays when you do either of these.
In the above screenshot, you see several sections. At the top, there are menu items to Reset Icon to Default, create an Icon from Text, and Manage Custom Icons. Below that, you see five recent custom icons; if you haven’t applied any custom icons, you won’t see this, but if you have, you can use this section to quickly apply custom icons that you use for multiple items. Next is Text-Based Icons; you can use this to set text or emojis as icons.
Next is a section with a variety of icon types – books, flags, etc.; each item here has a submenu with multiple colors or types of icons – and the final section contains a couple dozen custom icons that you can use, such as a calendar, clock, and more.
To change an item’s icon, select one of these, and Scrivener sets it to the selected item in the Binder. You can also select multiple items in the Binder and change them all this way. To select items that are not adjacent – say you want to select all the folders in your project – click one item, then press the Command key (Mac) or the Ctrl key (Windows), and click another item.
To use your own custom icons, such as photos or graphics, choose Manage Custom Icons. You can add icons here, either to your project, or to use globally in all your Scrivener projects. To add them to this project, drag them to the top section of the window; if you want them to be available in all your projects, add them to the bottom section. Icons on your computer won’t display if you view your project on another device. (Note that on Windows, you can only add custom icons to your projects.)
You might want to add photos here, as in this example, or other graphics that you find useful.
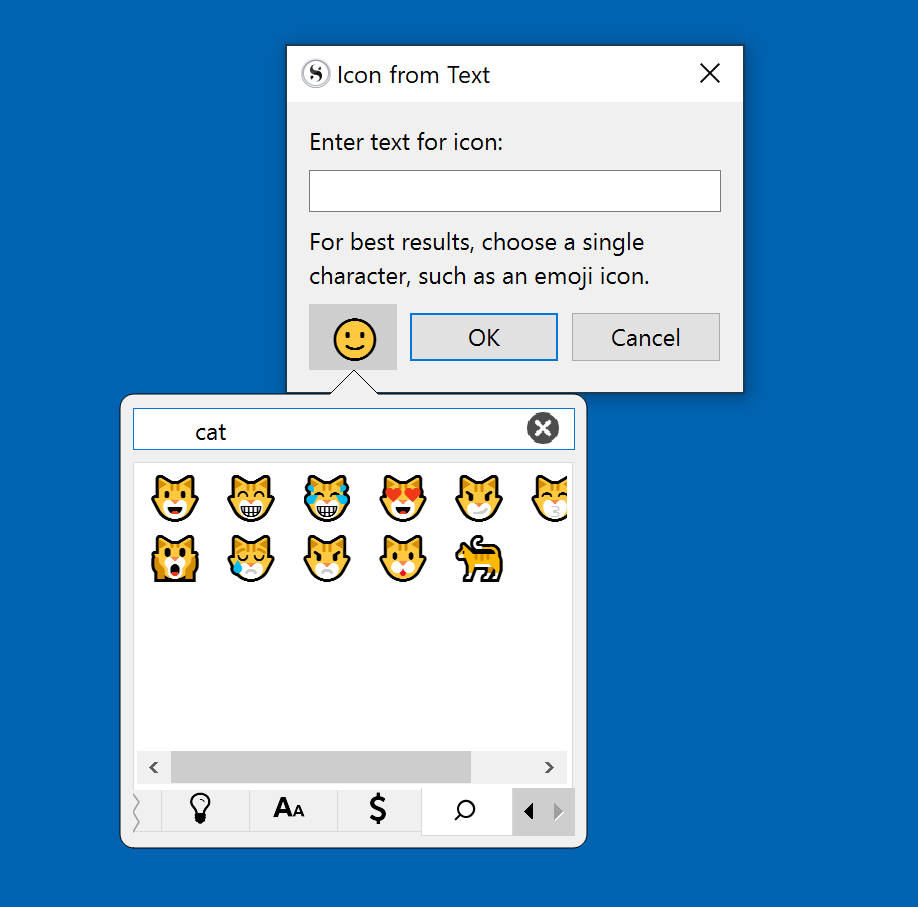
You can also add text icons, which can include emoji, giving you hundreds of other options for custom icons. To do this, choose Icon from Text, and Scrivener will display the emoji palette. You can scroll through these emoji, or search for one by name.

If you ever want to remove your custom icons, choose Reset Icon to Default from the Change Icon submenu. You can do this for your entire project, if you wish, by selecting all the items in the Binder (Command-A on Mac, Ctrl+A on Windows) and choosing Reset Icon to Default.
For more on using custom icons, as well as tips for making your icons sharp and making them compatible with the iOS / iPadOS version of Scrivener, see section 7.4 of the Scrivener manual.
Kirk McElhearn is a writer, podcaster, and photographer. He is the author of Take Control of Scrivener, and host of the podcast Write Now with Scrivener.

