

You can leverage a number of features in Scrivener to track your writing submissions within your Scrivener projects.
When you’ve finished writing a novel, it’s time to submit it to agents in the hopes of getting published. If you write short stories, articles, or poems, you may regularly submit your work to journals and magazines. It’s important to attract these submissions so you know when you sent them, whether you got a response, and, for stories, articles, or poems, when they were published.
Many writers use a simple spreadsheet to track this information, but you can do this in Scrivener. Using a number of Scrivener’s features – custom metadata, Outline view, and more – you can track all your submissions in the Scrivener projects you are working on, or you can create a separate Scrivener project to track submissions. Here’s how.
Why should you track submissions in a Scrivener project?
One of the best reasons to do this is because you will have all your submission information in the same project as your writing. You’ll be able to consult your manuscript or your stories whenever you get a response from an agent, publisher, journal, or magazine. Anytime you wish to check the status of submissions, just open your Scrivener project and make a few changes.
In this article, I will look at setting up a submission tracker folder within an existing Scrivener project. If you write short stories, articles, or poems, you might benefit from creating a separate project, or you could use the same technique to create a separate Scrivener project just for this purpose. For novels or other types of books, including this information in their projects probably makes more sense.
How to set up a Submissions folder
Start by creating a Submissions folder in your Scrivener project’s Binder; you can put it anywhere outside the Manuscript folder, to ensure that it isn’t included when you compile your project, and doesn’t count toward statistics.
In that folder, you can then create files for each submission. In this example, I’ve created files for different agents. If you write short stories, articles, or poems, you can create sub-folders in the Submissions folder for individual items, and files in those sub-folders for submissions.
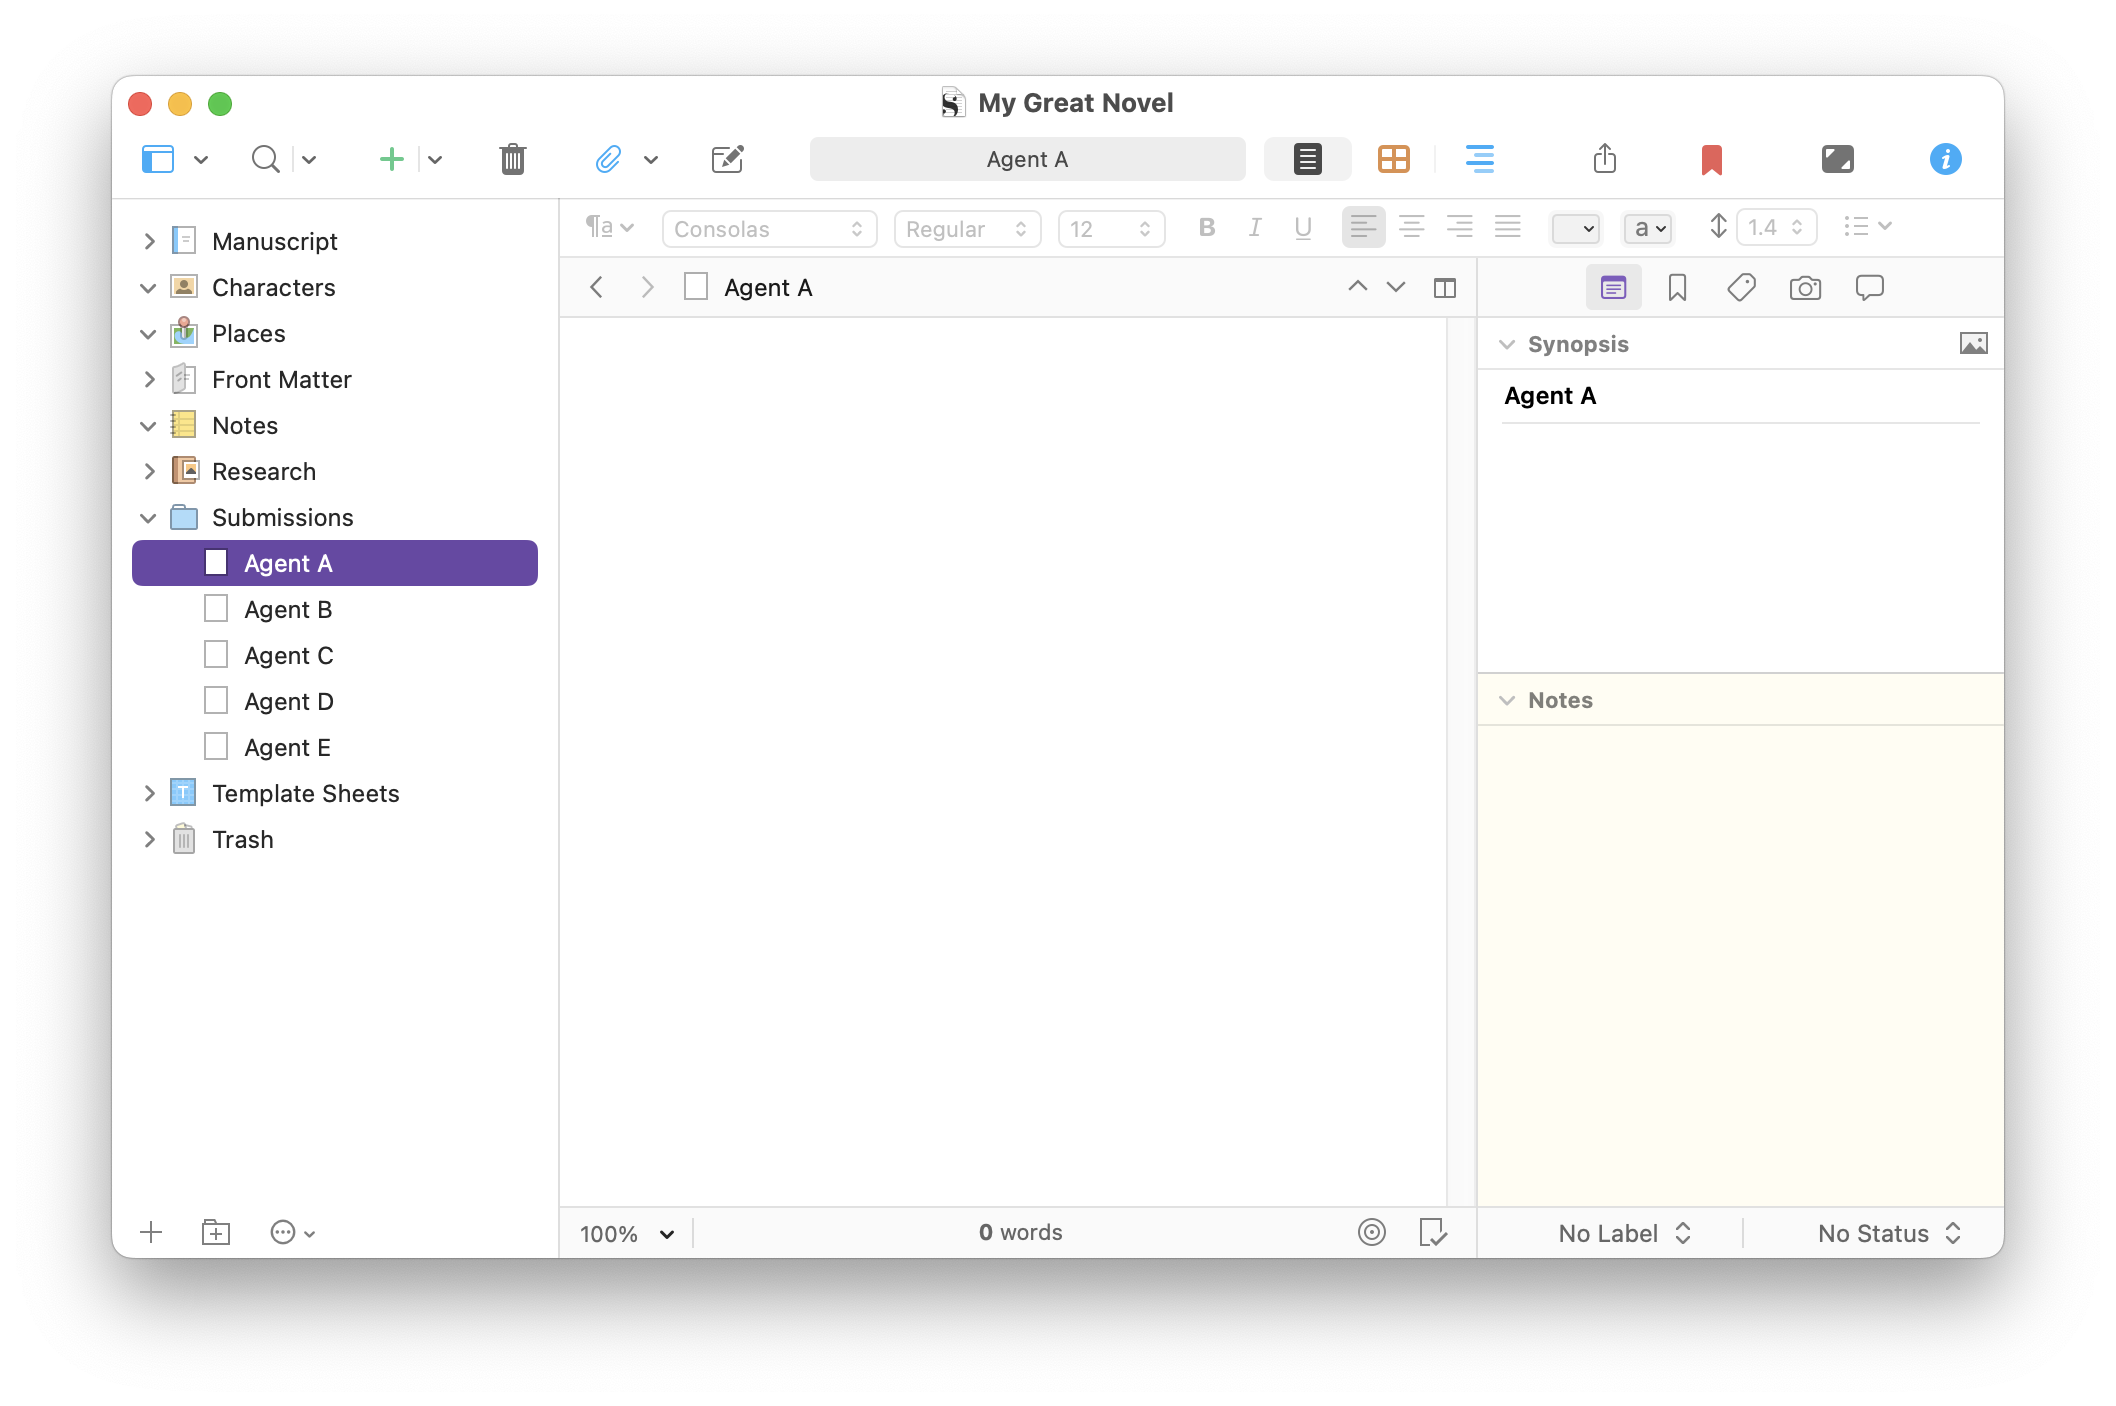
As you can see above, the Agent A file is just an empty text file. You can add anything to this file, as well as enter information in the Synopsis or Notes sections of the Inspector. You might want to include in these files authors that the agent represents, genres they are interested in, or any personal information if you have met or spoken with the agent.
But you won’t just be entering your data about a submission in these files. You can use custom metadata to add types of data that will help you track submissions.
Click on the Metadata icon above the Inspector, then click Set Up Custom Metadata. (See How to Add Custom Metadata to the Scrivener Inspector for a full discussion of using custom metadata.) Click + to add custom metadata, enter a name, and then choose a type. For most of these fields, you’ll use Text or Date, but you may want to use a checkbox or list for some of them.
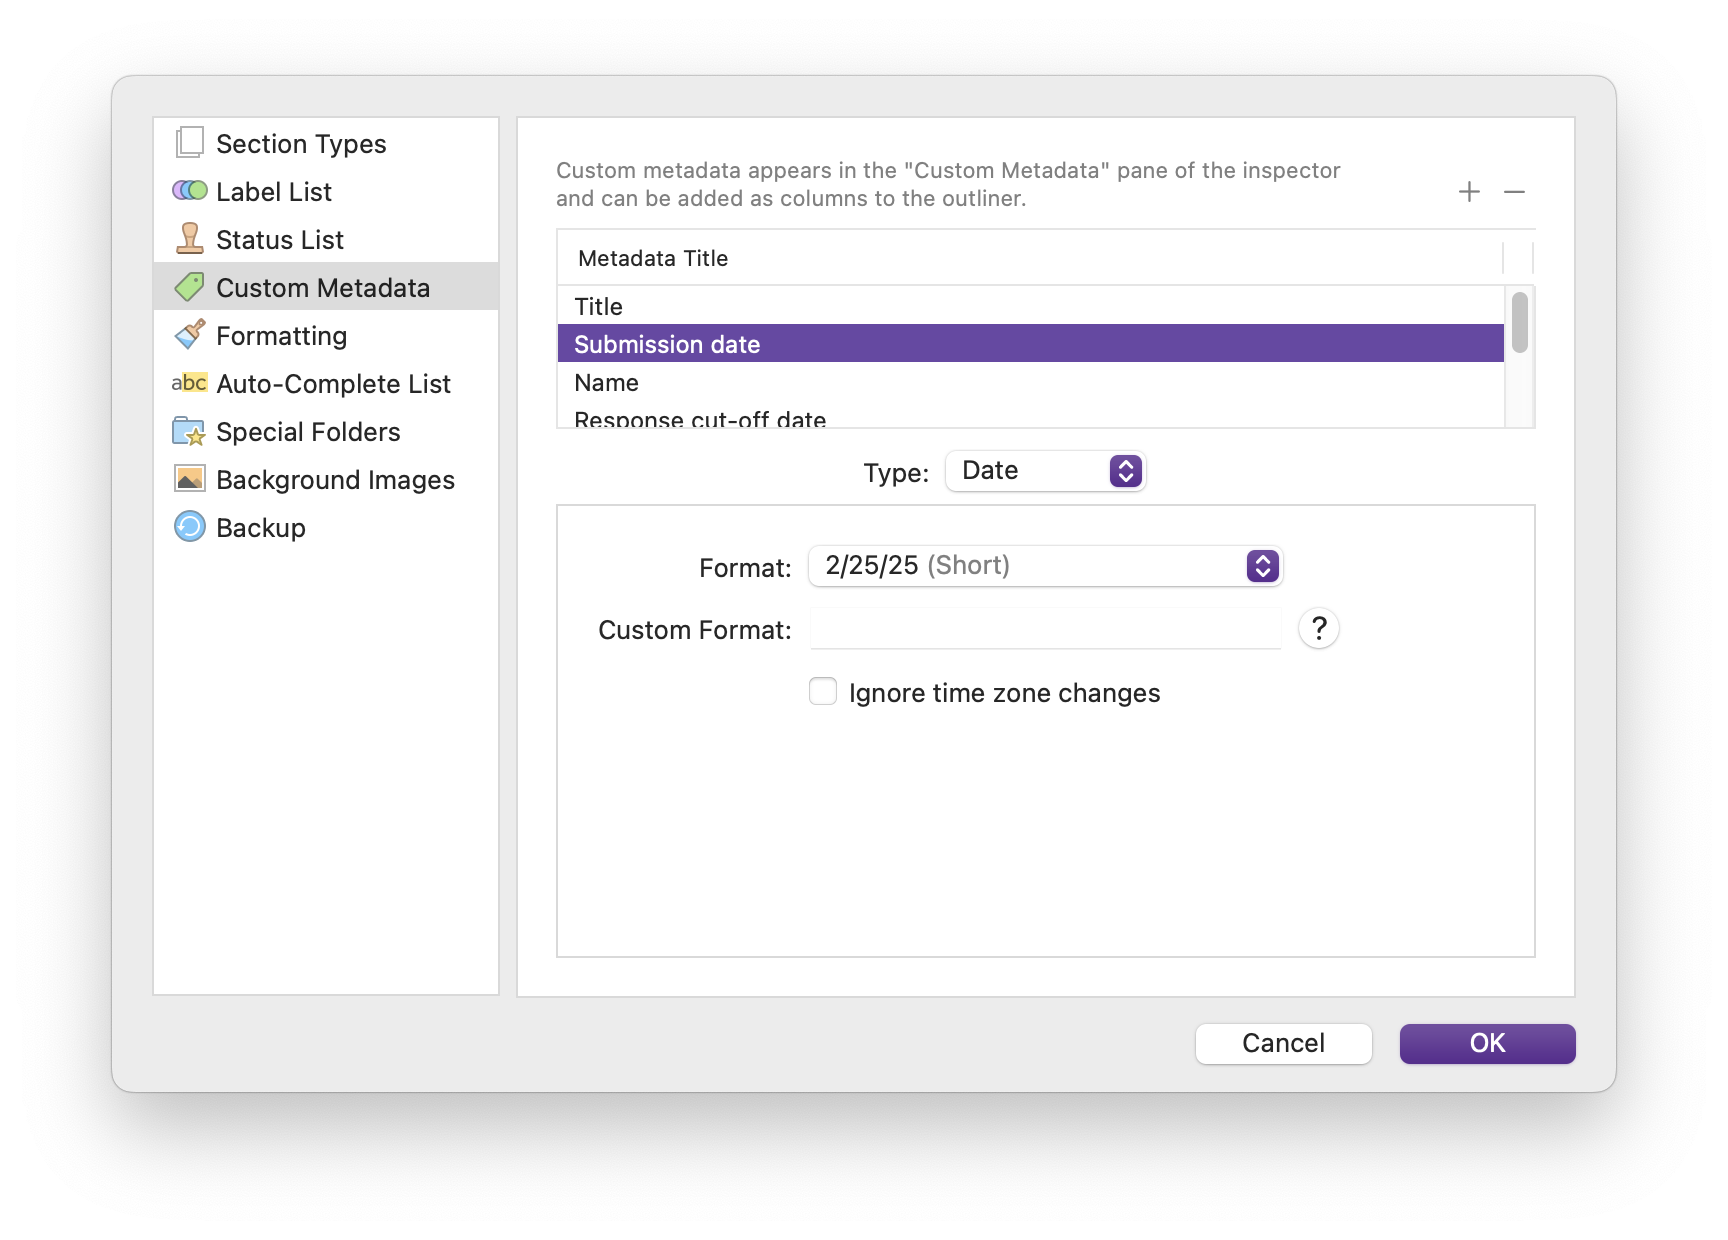
For my example, I’m using the following custom metadata:
- Title (for stories, articles, or poems). If you create subfolders for these items, then you don’t need this field.
- Submission date.
- Response cut-off date (the amount of time after which a non-response is considered a rejection).
- Response date.
- Response (the type of response).
- Publication date (for stories, articles, or poems).
- Publication info (issue number or URL).
For the Response field, you could create a list, with options such as Rejection, Personalized Rejection, No Response, Full Manuscript Request, Rewrite Request, and Published (for short works).
Here’s how this looks in the Inspector for a submission with a response and a full manuscript request.

View submissions in Outline view
This submission tracker becomes much more useful when you switch to Outline view. Click the Submissions folder, then click the view mode button in the toolbar to switch to Outline view.
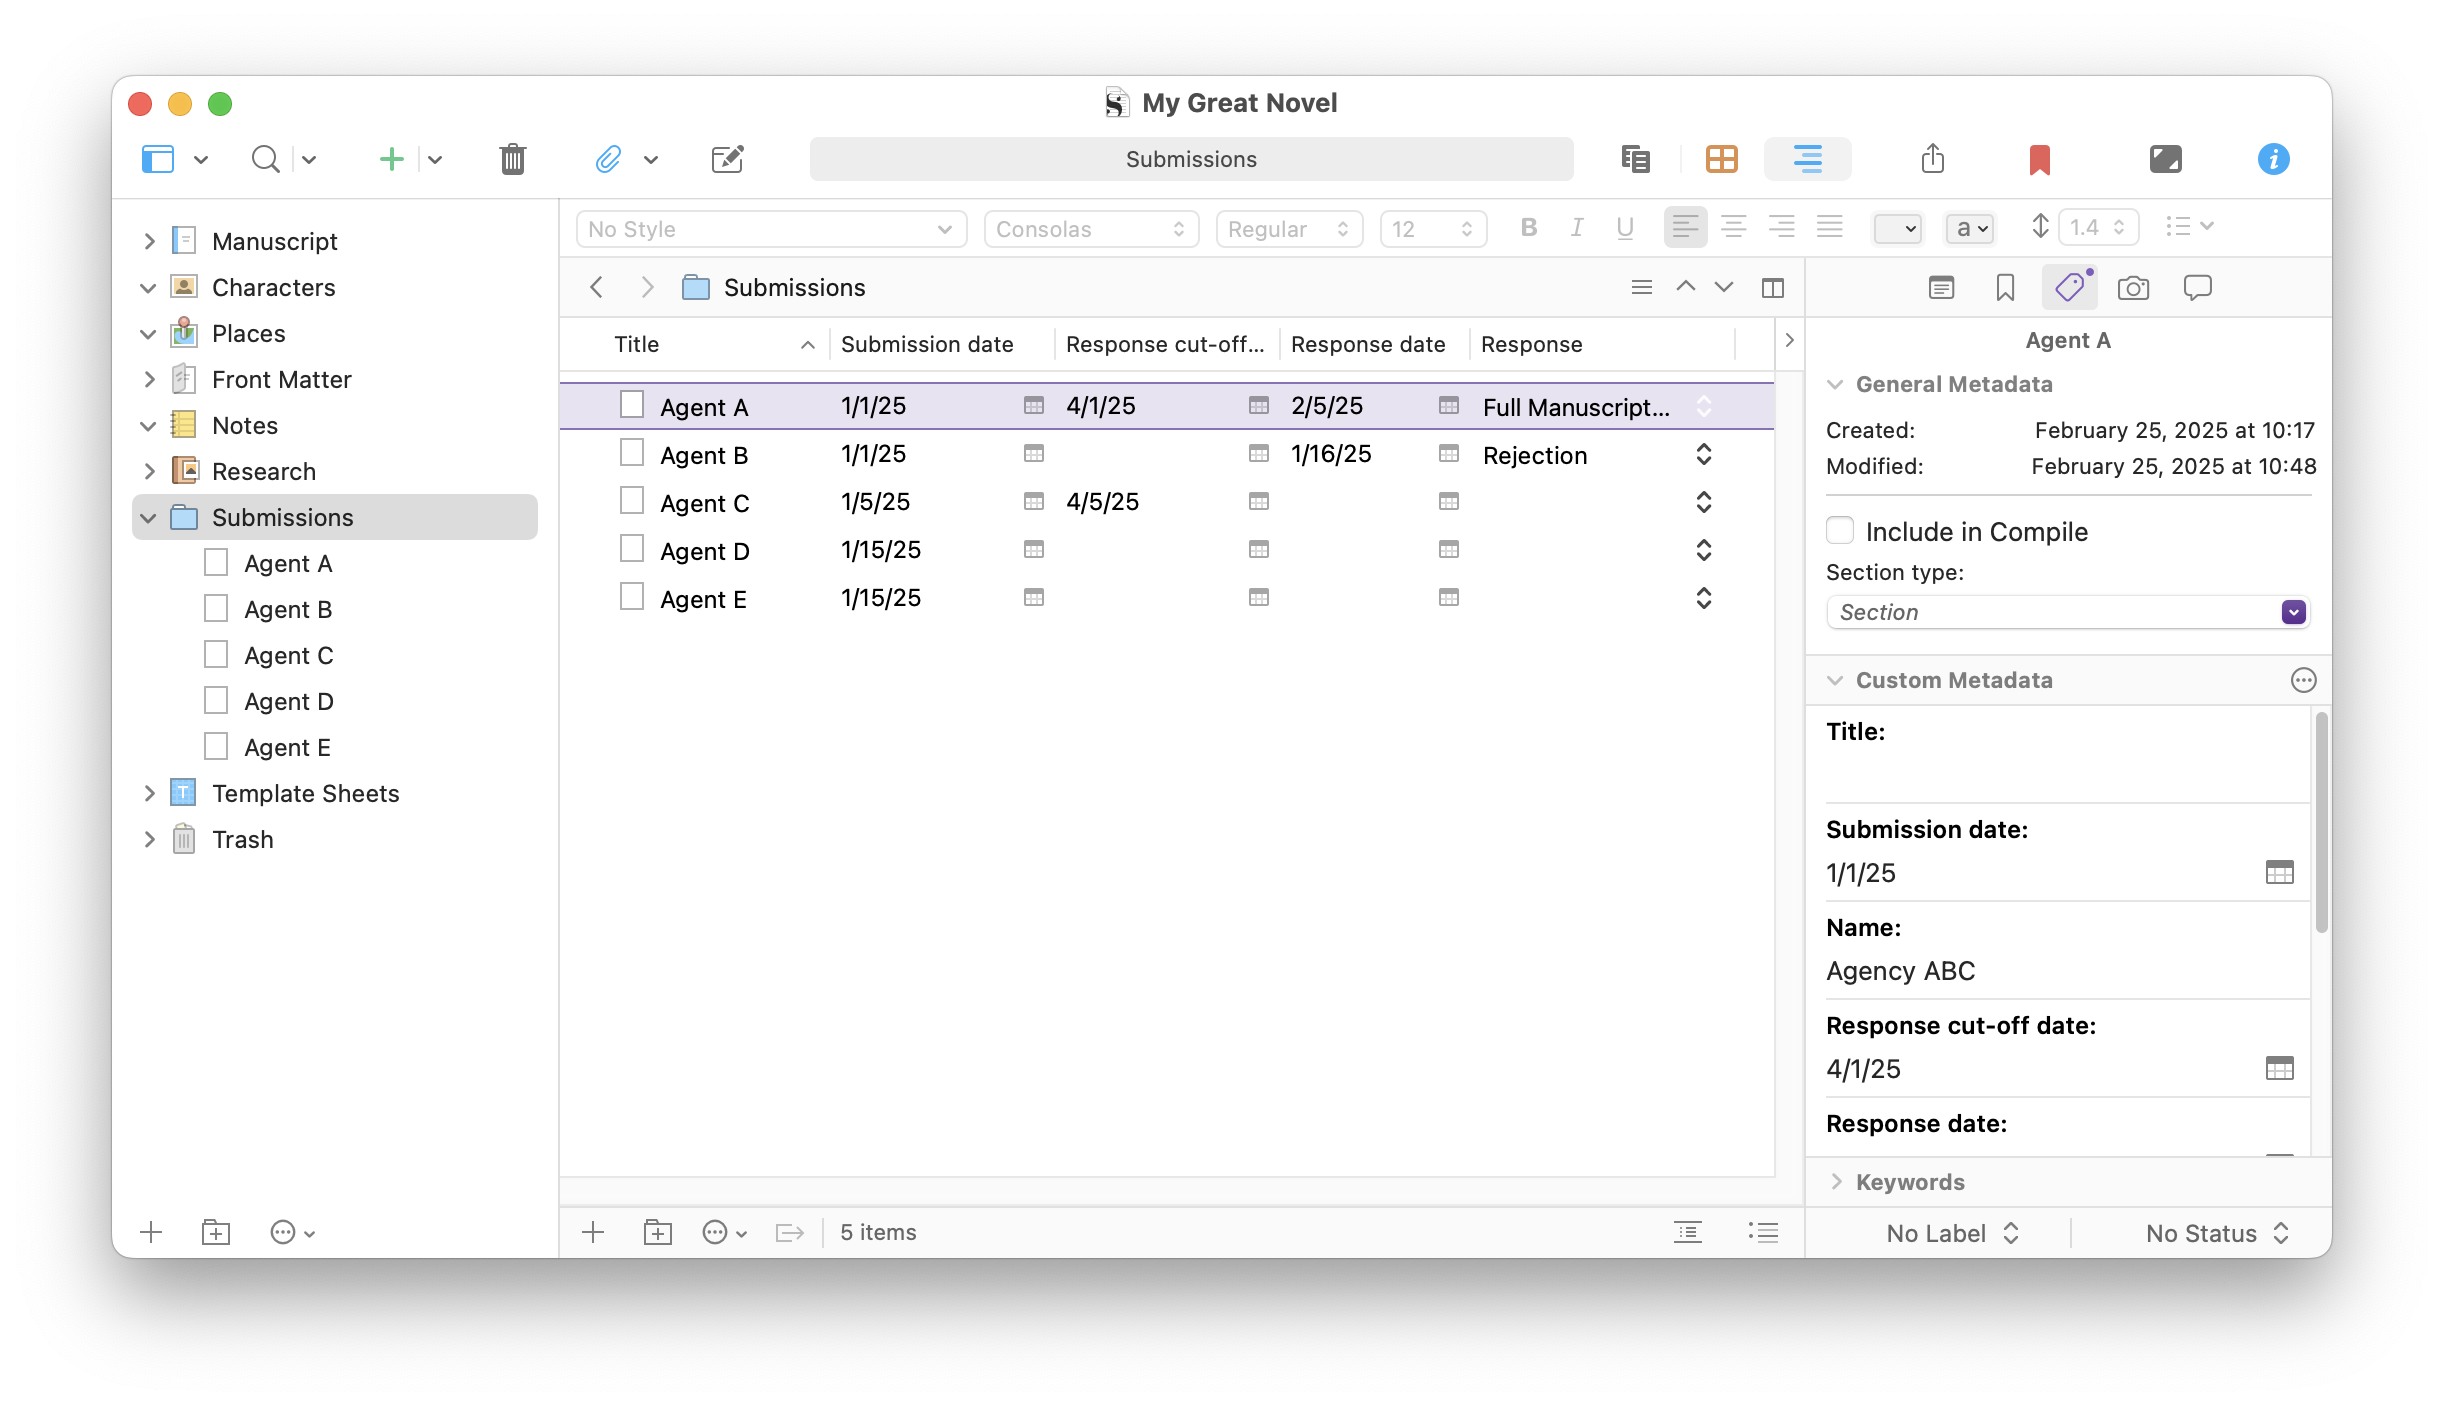
As you see in the article about custom metadata, you can right-click a column header and choose what that column displays. By default, the Outline shows a number of fields that you probably don’t need to see for your submissions, such as Synopsis, Status, Label, etc. By deselecting these and selecting others, you can display your Submissions folder as below:
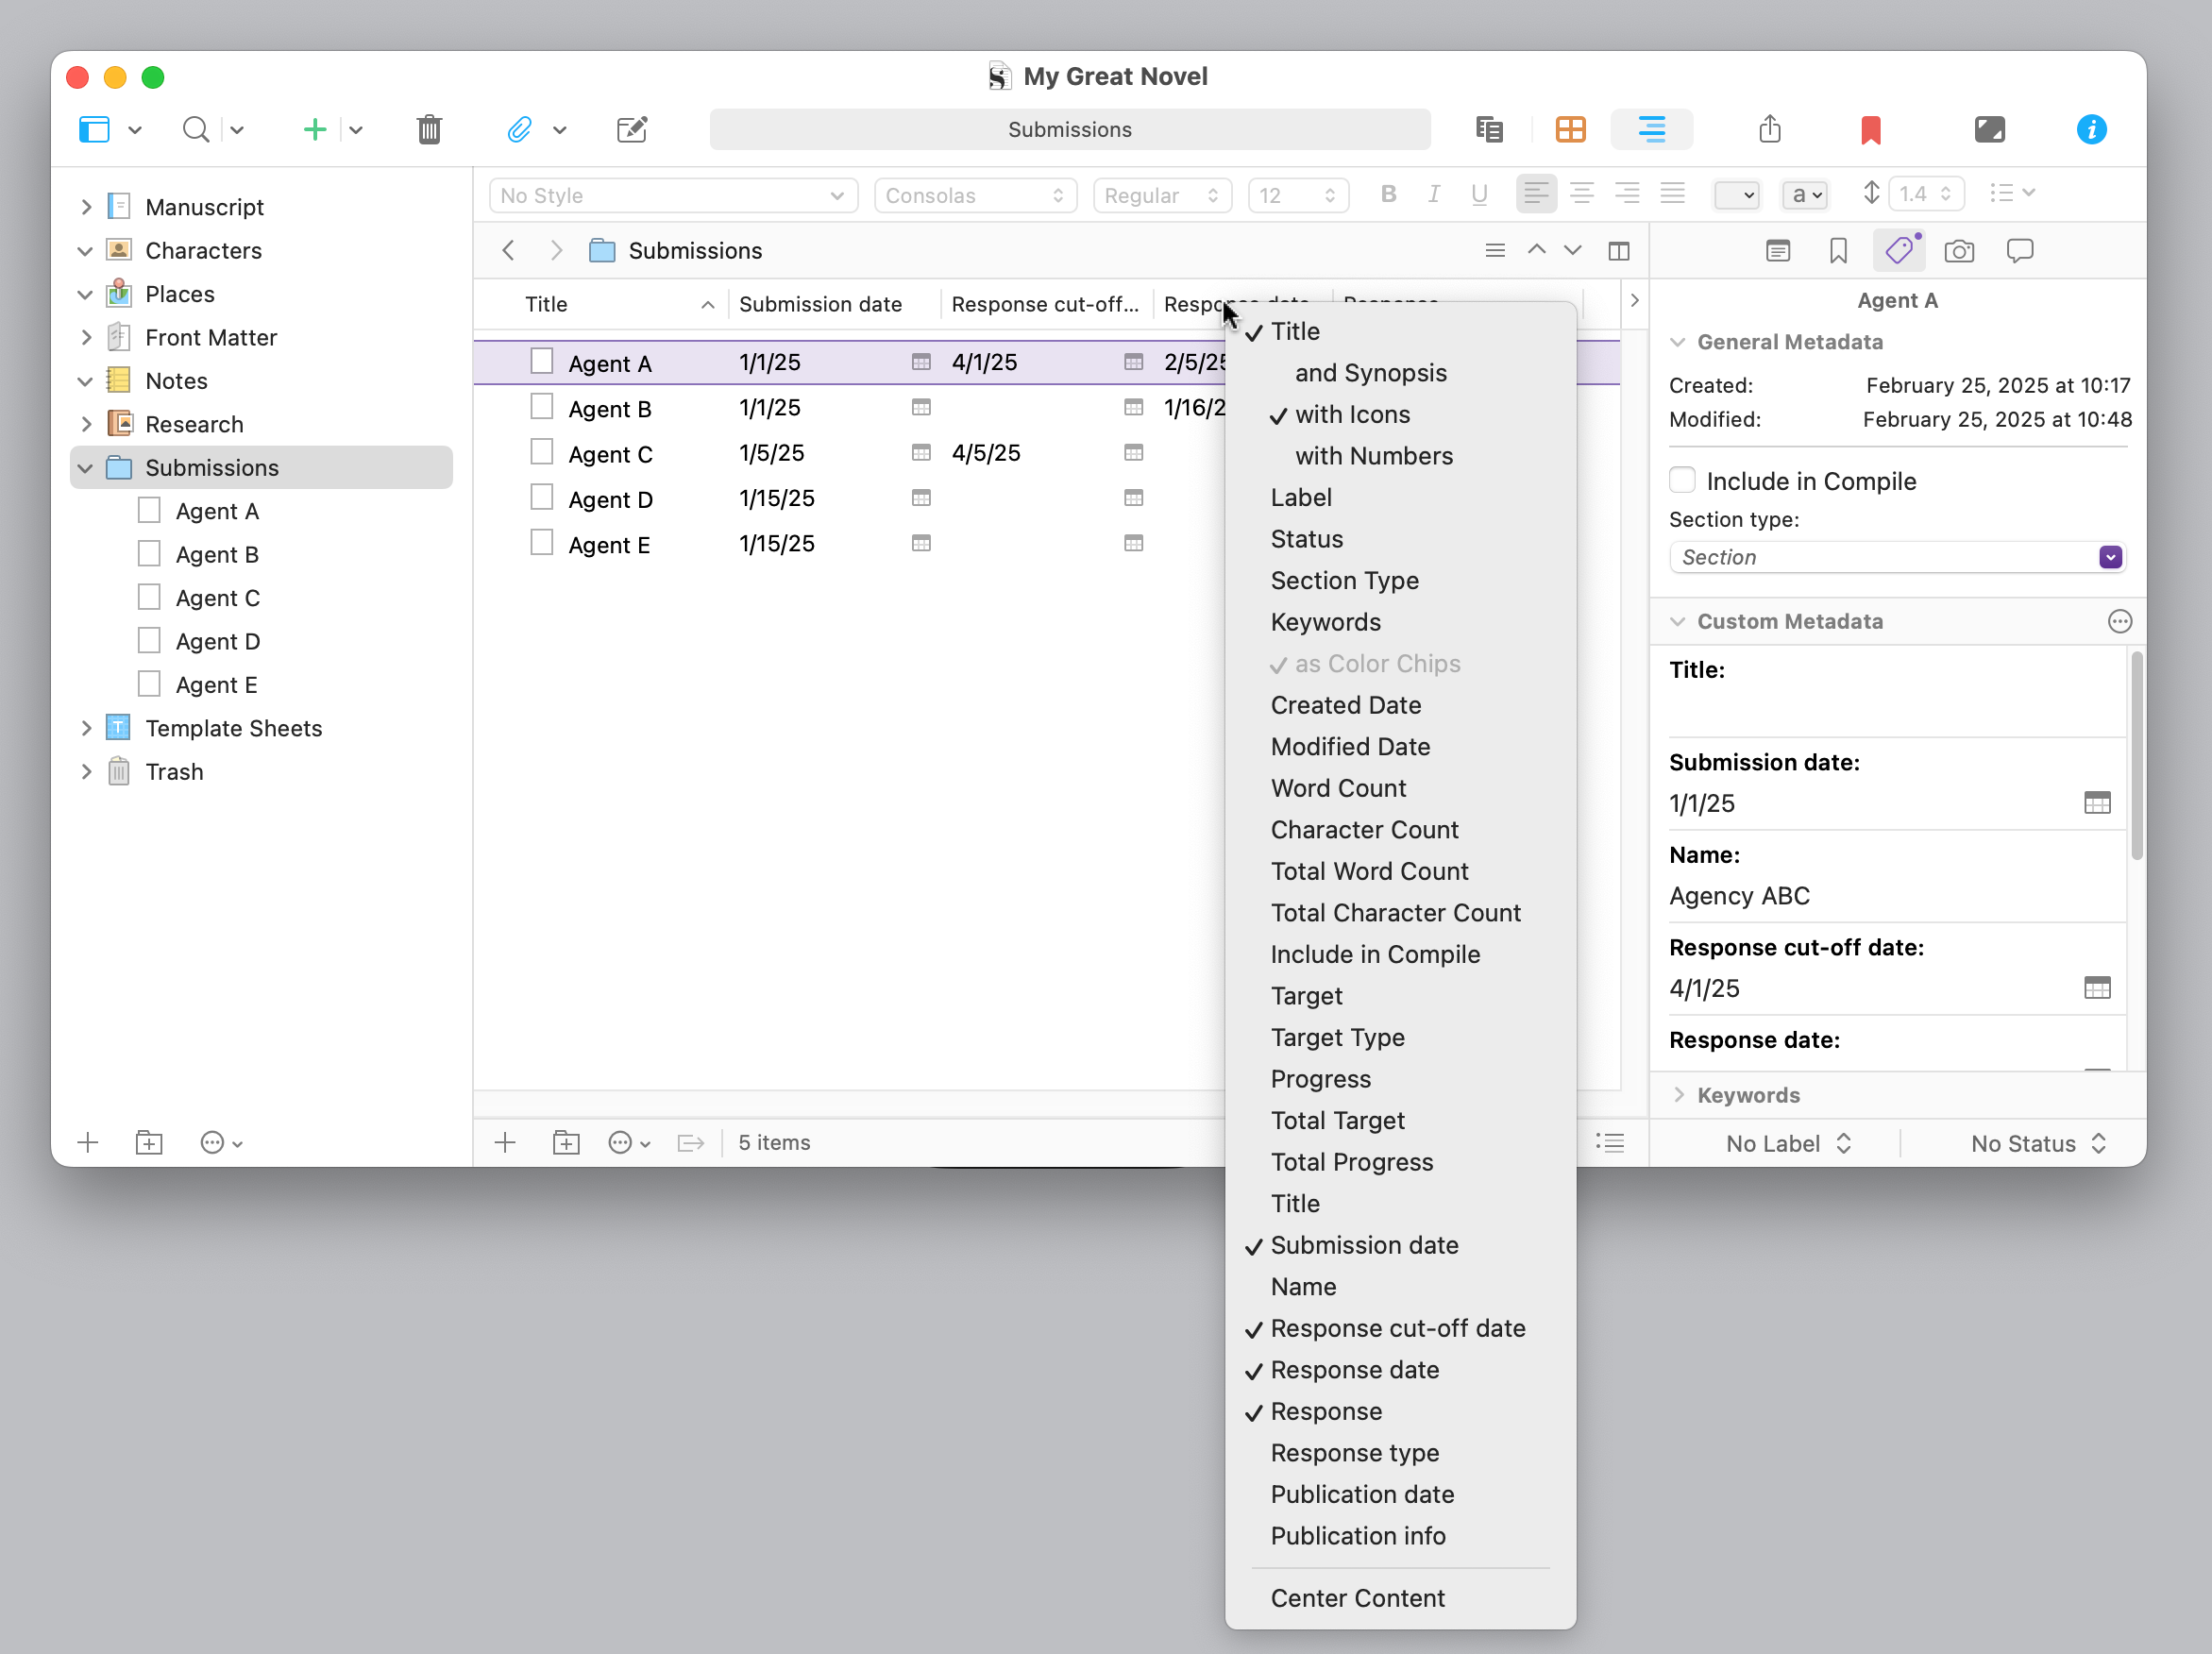
You can sort any column by clicking its header. Above, the folder is sorted by Title – which is the name of each agent that I used to title each file. You can sort by Submission Date, Response cut-off, Response date, or any other field.
View submissions on the Corkboard
If you want, you can also view your submissions in the Corkboard. Each file in your Submissions folder, which represents one submission, shows up as a card on the Corkboard. Click it, and you see its metadata in the Inspector. You can also apply labels and status markers to files, some of which display in the Corkboard and the Binder.
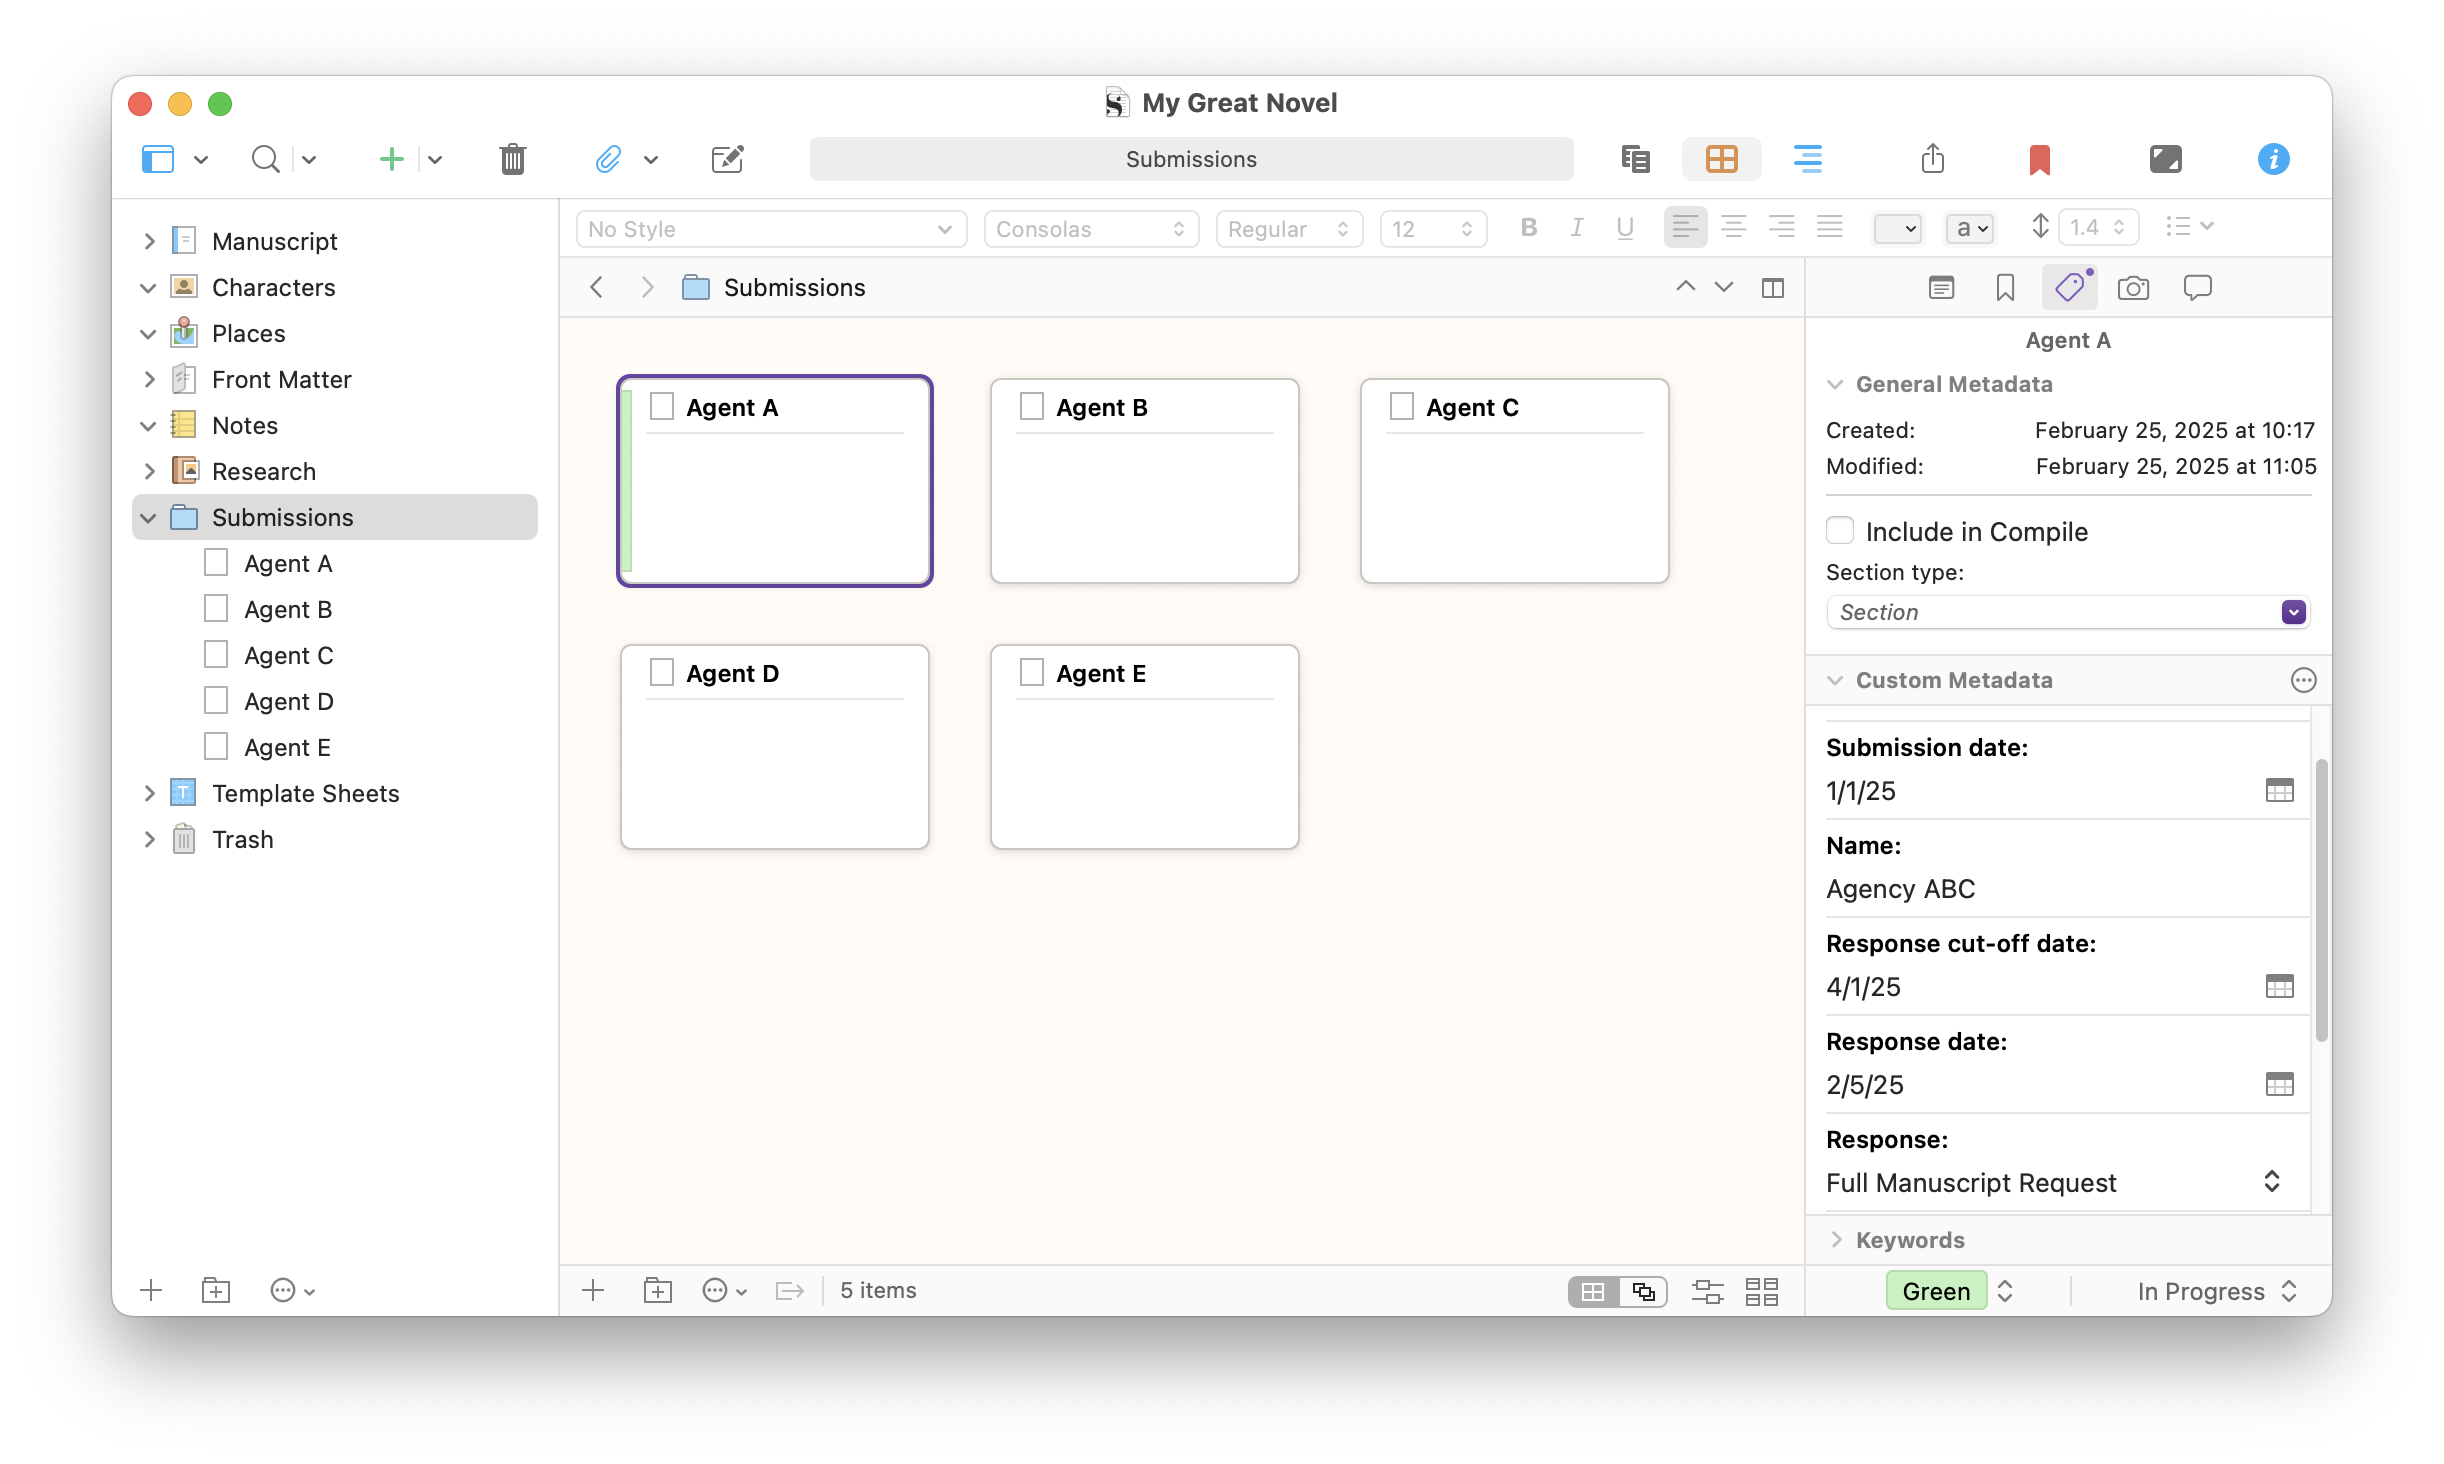
Above, you can see that the label for the selected card is green, which I’ve applied because there was a full manuscript request. You can change the names of labels; see the article linked just above. I’ve set the status market to In Progress, but you can also change status markers; you could change them to match the terms you use in custom metadata. Labels and status markers can help you view this information in many views, but you probably don’t need to use them along with custom metadata.
The above discusses adding a folder to track submissions in an existing project. You can use the same process in a new project if you want a separate submission tracker. In that case, you can put your files in the manuscript folder; since you won’t be compiling the project, it doesn’t matter where these files are. 
Using your Scrivener project for tracking submissions can save you time, and help you organize your information more efficiently than creating a separate spreadsheet file. It only takes a few minutes to set up, and you may find that it streamlines the submission process. 
Kirk McElhearn is a writer, podcaster, and photographer. He is the author of Take Control of Scrivener, and host of the podcast Write Now with Scrivener.