The Inspector contains information that helps you manage your projects, giving you access to synopses, notes, comments, snapshots, metadata, and more.
Get to Know the Scrivener Inspector
The Scrivener window has three main elements: the Binder, the Editor, and the Inspector. Previous articles have looked at how you manage files and folders in the Binder, and how you can customize the Editor.
The Inspector contains information and metadata about your project and your files, bookmarks to other items, snapshots, and comments and footnotes.
In this article, we're going to take a close look at the Inspector, the third of the main elements in Scrivener.
Viewing the Inspector
Some writers want to see the Inspector all the time, because it contains information they want to refer to, such as synopses for their files. Others only want to view the Inspector when they need it.
By default, the Inspector is visible when you create a new project. But if it gets in the way, you can hide it. On Mac, choose View > Hide Inspector, on Windows, choose View, then click Inspector. There's a quicker way to do this from the keyboard: Command-Option-I on the Mac hides or shows the Inspector, and Alt+Shift+I does the same on Windows.
Elements of the Inspector
The Inspector has five elements, each of which is available by clicking an icon at the top of the Inspector:
From left to right, these are:
- Synopses & Notes
- Bookmarks
- Metadata
- Snapshots
- Comments & Footnotes
Content displayed in the Inspector depends on what you have selected in the Binder. If the currently selected document has content in the Inspector, a small dot displays to the right of the icon. In the screenshot above, the dot next to the Bookmarks icon indicates that there are bookmarks attached to the selected document.
Synopsis & Notes
You can add a synopsis to any item in the Binder. Just click the Synopsis icon in the Inspector, and start typing. Synopses also display if you select items to which you've added them in the Outliner or on the Corkboard.
In this screenshot, you see the Outliner, and the synopsis displays both in the Outliner, and in the Inspector. If you switch back to the Editor, you still see the synopsis in the Inspector.
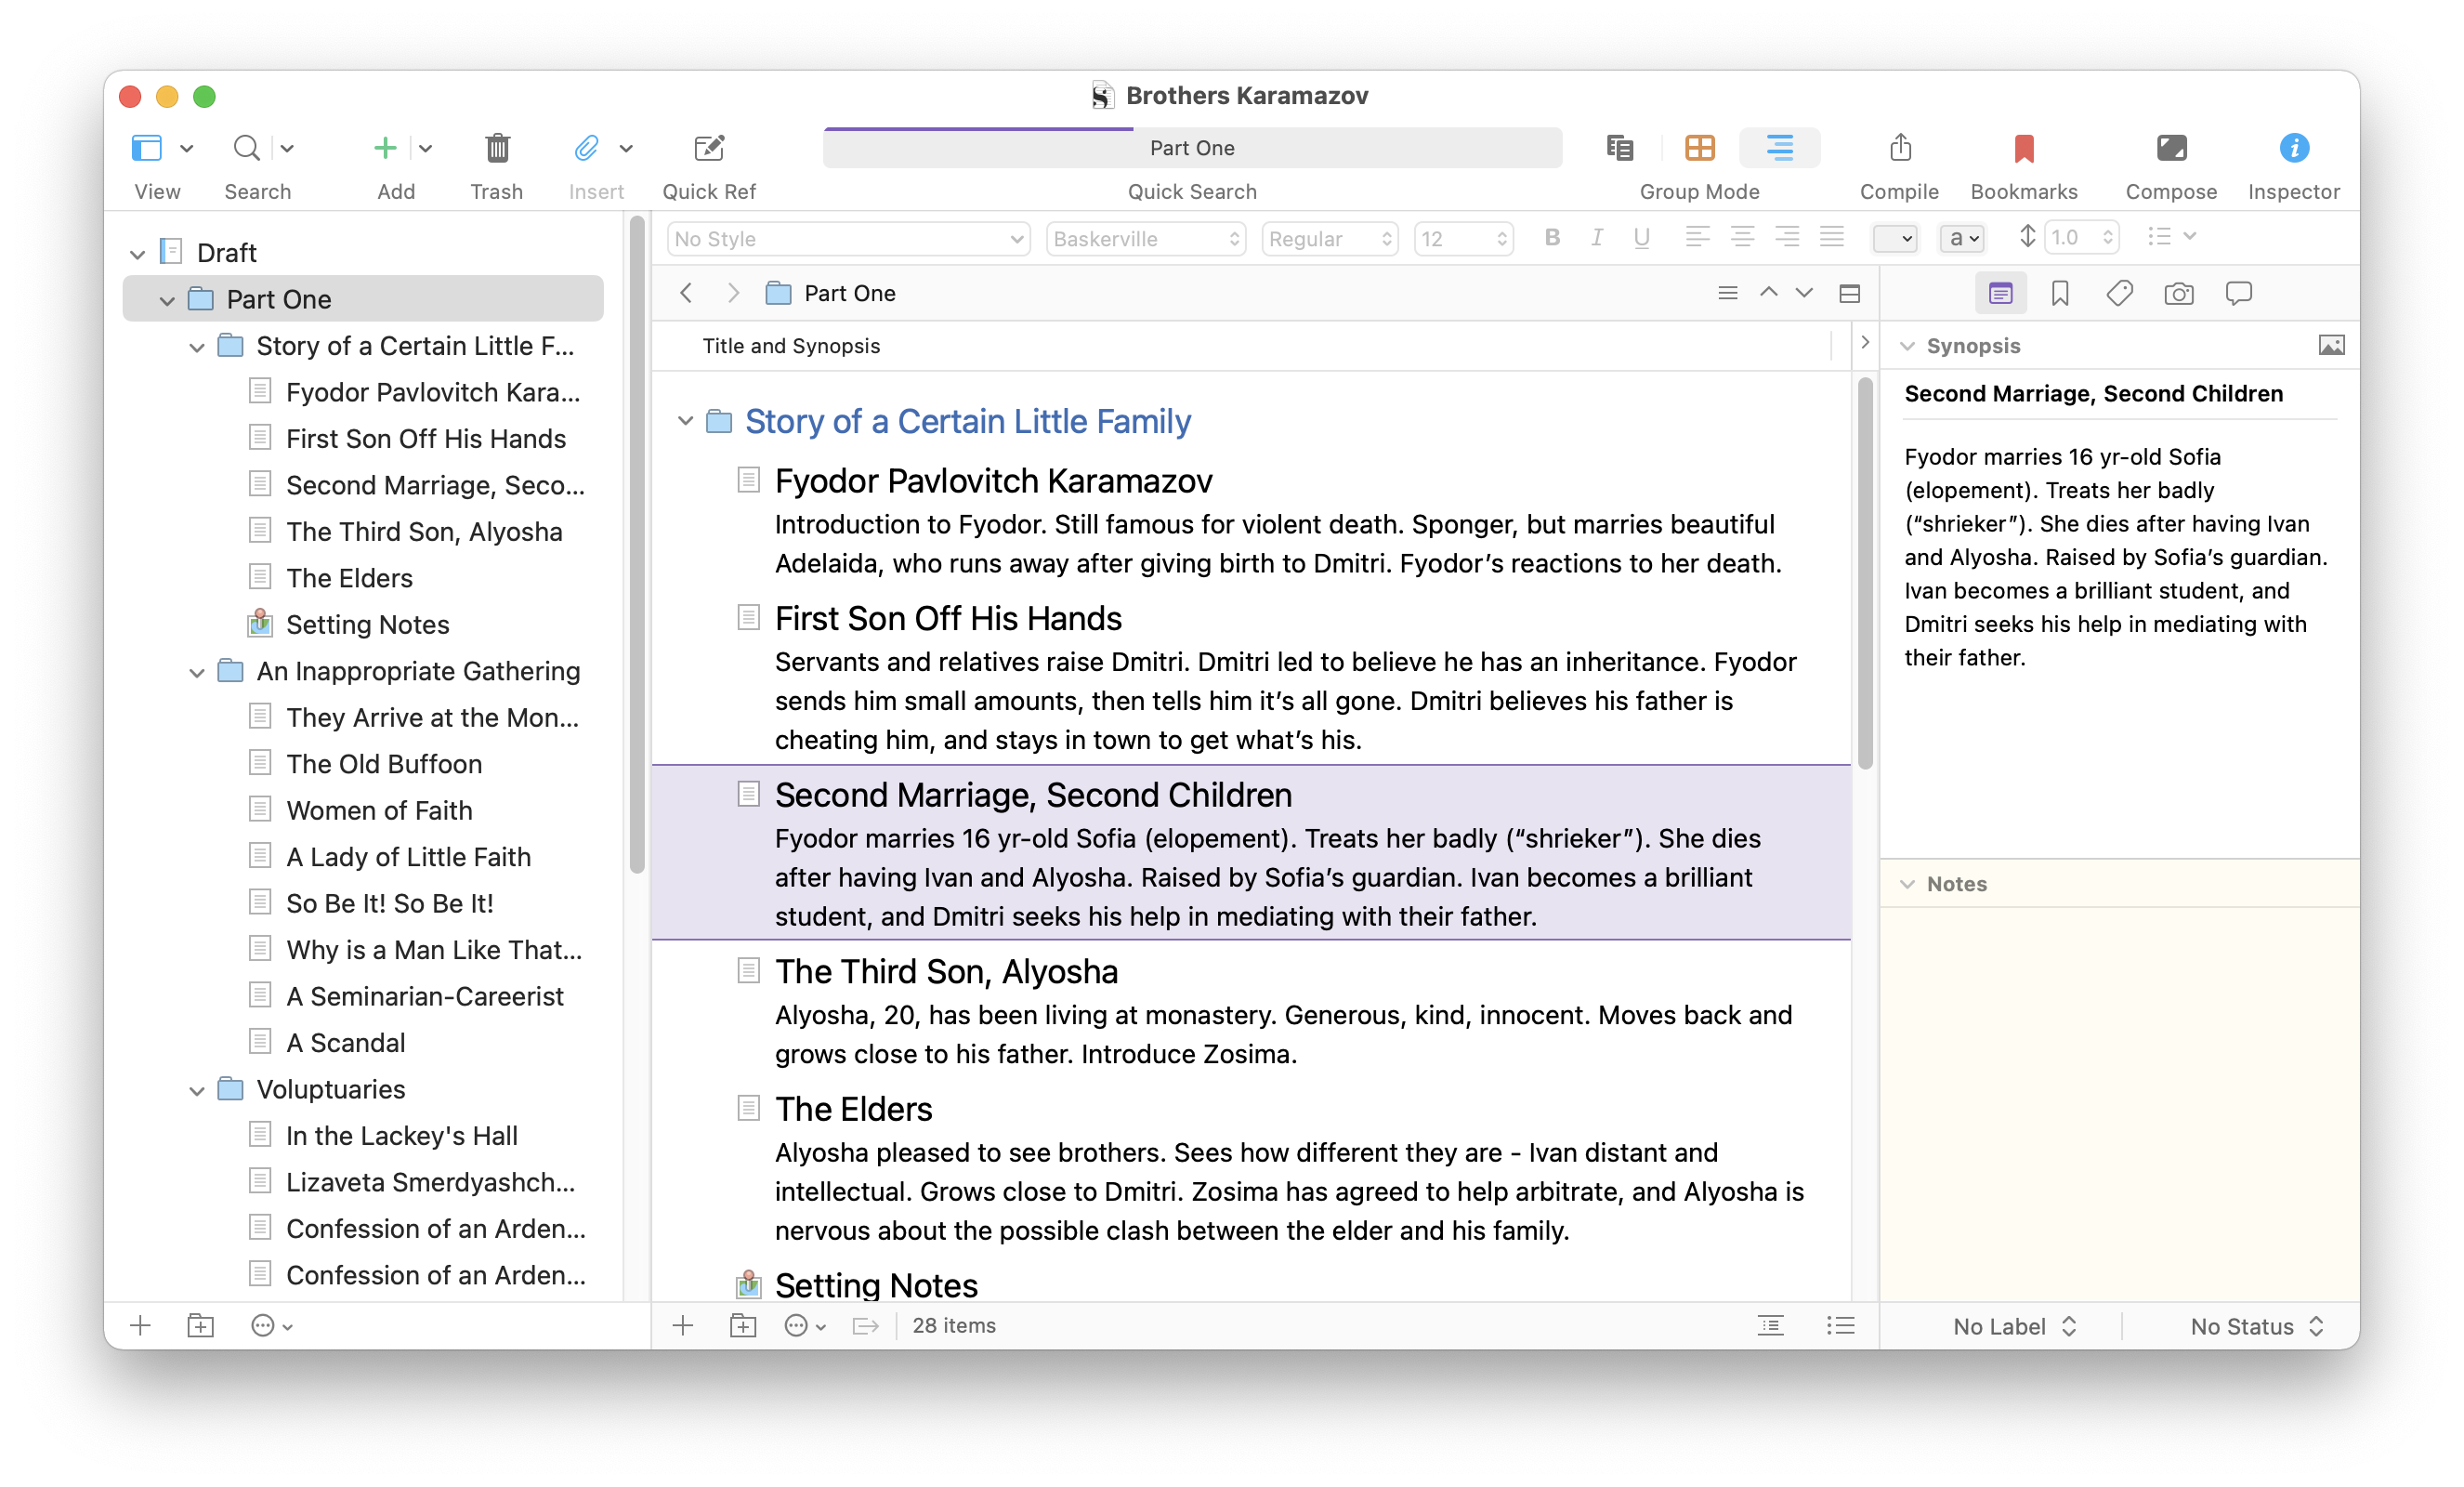
You can change synopses in the Inspector at any time, and they are updated in the Outliner and Corkboard.
Below the Synopsis, there is a Notes section, which contains notes that you want to add to any item. Notes display in all views: Editor, Outliner, and Corkboard.
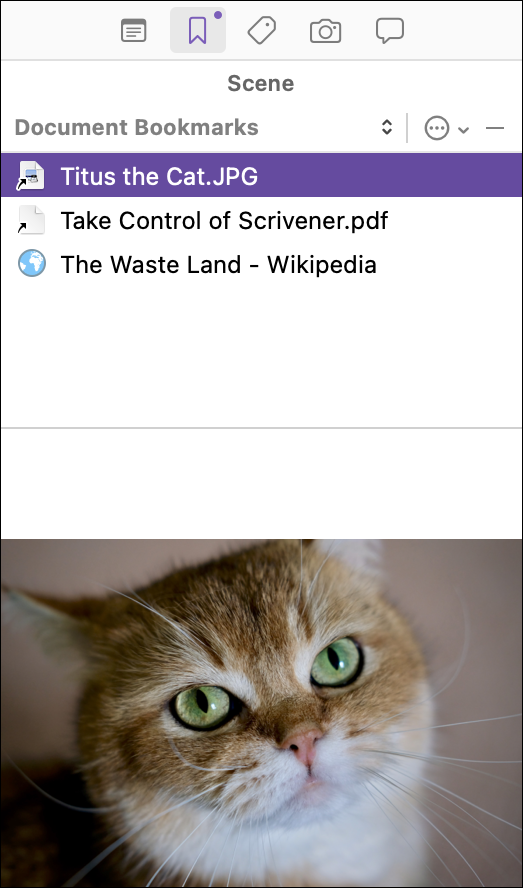
Bookmarks
You can store bookmarks here to link to elements in the Binder, as well as files that are not in your project. To add a bookmark for an item in your Binder, click the Bookmarks icon in the Inspector, then drag an item from the Binder.
You can store bookmarks with an individual document, and they display when that document is selected. You can also store Project Bookmarks, which are available no matter what you are viewing in the Binder. Click a bookmark to see its content in the Inspector.
See Use Bookmarks in Scrivener Projects to Link to Internal and External Files to learn how to use bookmarks.
Metadata
The third icon is where Scrivener stores metadata about your project. This includes information such as the date a file was created and modified, whether it's included in Compile, and its section type for compiling.

You can even add custom metadata, such as checkboxes, lists, and dates.
Snapshots
The fourth icon of the Inspector, the one that looks like a camera, stores snapshots you make of your documents. When you make a snapshot in Scrivener, the app saves a document at the moment you make the snapshot. You continue working on the document, and add to it or edit it, but that snapshot is available if you ever want to go back. You may have cut text from your current document and want to look back to see if you want to restore some of your excisions. You may have edited a chapter of a project and feel that the original version might have been better. Or you may have accidentally deleted some text in a document and need to recover it.

For more on snapshots, see Use Snapshots in Scrivener to Save Versions of Your Projects.
Comments & Footnotes
If you add comments or footnotes to your documents, they display in the Inspector. Click the rightmost icon, the one that looks like a speech bubble, to see these notes.

Comments and footnotes, like synopses and notes, are attached to individual documents, so they only display when you've selected a document, or when you're in Scrivenings mode, showing the contents of multiple documents.
When you click a comment or footnote, Scrivener highlights it in the document. You can edit the comment or footnote, or delete it by clicking the small x at the top right of its box.
You can also make comments and footnotes smaller by clicking the down-pointing caret on the left side of each one; expand them by clicking the >.
For more about comments and footnotes, see Use Annotations, Comments, & Footnotes in Your Scrivener Projects.
Using the features in the Inspector help you manage your projects, giving you access to synopses, notes, comments, snapshots, metadata, and more. They can help you work with your text, without getting in the way.
Kirk McElhearn is a writer, podcaster, and photographer. He is the author of Take Control of Scrivener, and host of the podcast Write Now with Scrivener.